


Oracle Cloud Infrastructure (OCI) is the foundation of Oracle’s second-generation cloud. Since 2020, new provisioned the EPM cloud applications started using the OCI platform for running the enterprise applications. OCI is engineered from the ground up to run mission-critical databases, workloads, and applications while providing end-to-end security. A lot of EPM Cloud features that are available only in OCI.
With all of the great benefits, more and more EPM cloud customers are moving towards the OCI platform. To make one step further, Oracle has announced that they plan to migrate all Classic Commercial environments to OCI by the end of 2023 using monthly migration waves. It is great to see all the legacy environments would be moved to OCI soon.
Oracle has offered two type of migration plans.
- Customer managed migration
- Oracle managed migration
For more details, please check my previous post below.
I do suggest you consulting EPM cloud migration experts before the migration. Typically, other than the application migration, there are integration, single sign on, automation involved.
If you have been serve as the system admin and familiar with integration process, doing the OCI migration on your own is surely doable. The core application and integration migration are pretty standard. One of steps that is quite different than the legacy platform, is the single sign on configuration.
We will dig into the details in this post. Hopefully, the following steps will be able to drive you doing the SSO configuration from end to end.
OCI SSO Configuration Architecture
Start with the architecture, this will give you a general flow of the configuration.

Step by Step OCI SSO Configuration
Firstly, login to Oracle Identity Cloud Service.

Then add the internal SSO IDP to Oracle OCI.
Expand Security and select Identity Providers.

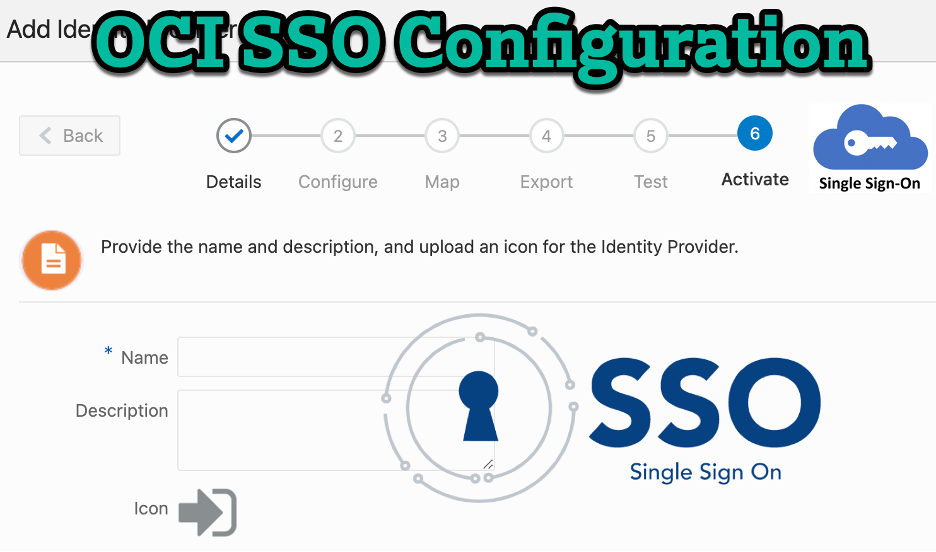
Click on Add SAML IDP. It will go through the 6 steps configuration.
Enter the name and description for the IDP.

Click on Upload to submit the IDP metadata.
Select SHA-256 as the Signature Hashing Algorithm, and check Include Signing Certificate.

Now set up Map. Select or leave default the attributes:
- Identity Provider User Attribute: Name ID
- Oracle Identity Cloud Service User Attribute: Username
- Requested NameID Format: <None Requested>

Review the Service Provider URLs. Click on the first Download button to export the metadata. Submit the metadata file along with the URLs to the IDP team for ADFS configuration.

Once ADFS team has completed the setup, come back here to Test and Activate.

Hope this post provides a few insights of SSO configuration, especially if you plan to do this in house without consulting team’s support.