


Attribute dimension is a very powerful function in Hyperion Planning, Essbase and EPM Cloud, such as PBCS/EPBCS. Now let’s focus on how to create and use attributes.
First thing first, what is Attribute. Generally speaking, attributes are the descriptions of data. Attributes are used to group data through alternative means as opposed to utilizing the existing dimensional rollups. In the meantime, we can use attributes for reporting purposes. We can assign attribute members of a dimension that are defined as sparse for all cubes. Also, we should be aware of attribute must be assigned to the same level sparse dimension members. Otherwise, errors display during refresh.
Let’s take a look at how to create attribute and how to use an attribute as a dimension, as a filter in web forms, ad hoc grids and reports. Also, we will see how to perform cross-dimensional rollups across attribute members.
Create Attributes
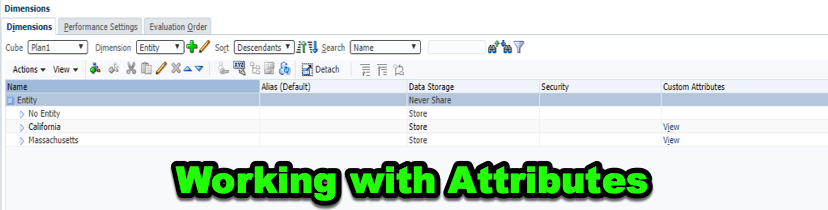
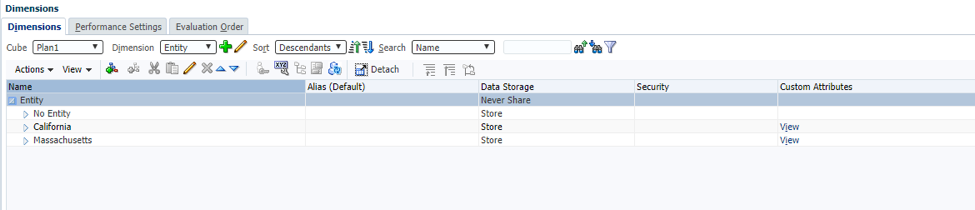
Create an EPBCS application and create some entities for testing purpose. In this case, we will use California and Massachusetts as two entities.
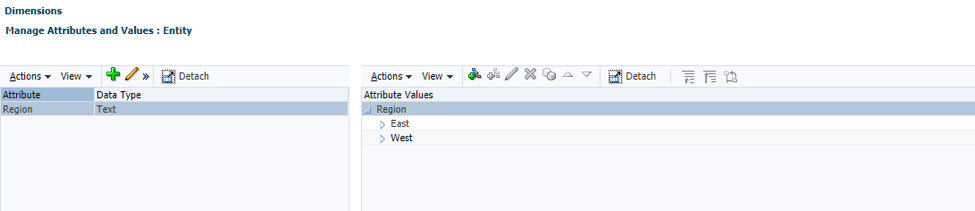
Click on the custom Attribute button to open the Manage attributes and Values page. We are going to create a Region attribute and create 2 members underneath it, East and West.
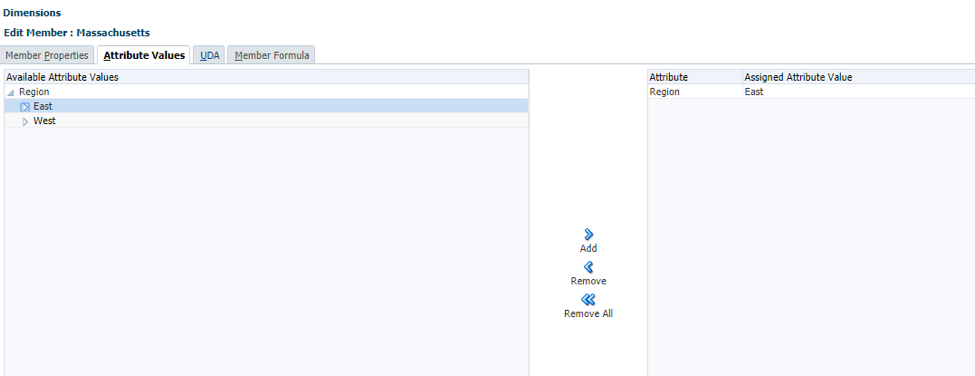
Go back to the Entity dimension, then assign West to California.

Assign East to Massachusetts.
Now we see under the Custom Attributes column there is a link. By clicking View, it will show us the attribute details.
Use Attributes
It is time to see how to integrate attribute into other parts of the application. We will see how to use attributes in three ways: web forms, Smart View and reports.
Web Form
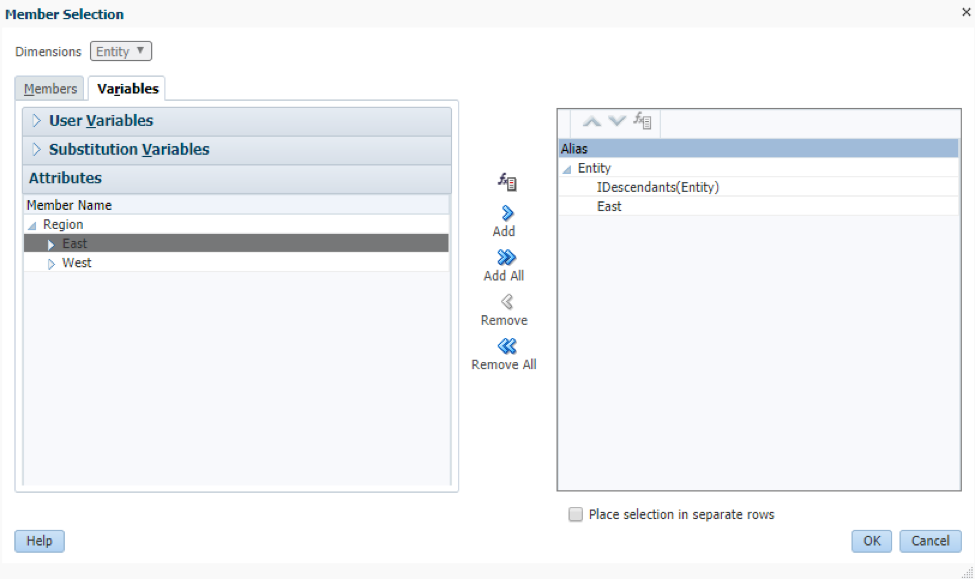
Edit one of the web form. After creating attribute dimensions, we see all of them showing up in the Attribute Dimensions section.

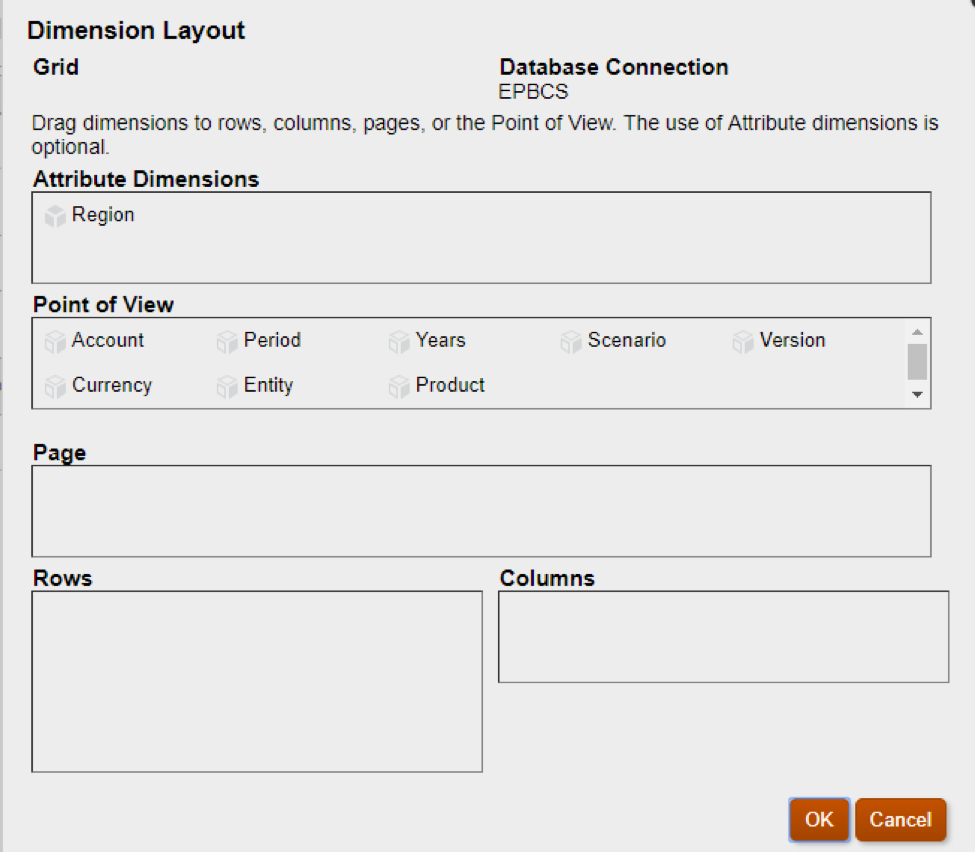
For the Rows, we are going to select Entity dimension. Since there is an attribute dimension Region has been assigned to Entity, let’s select one of the Region, East to the Entity section.
Save the web form.
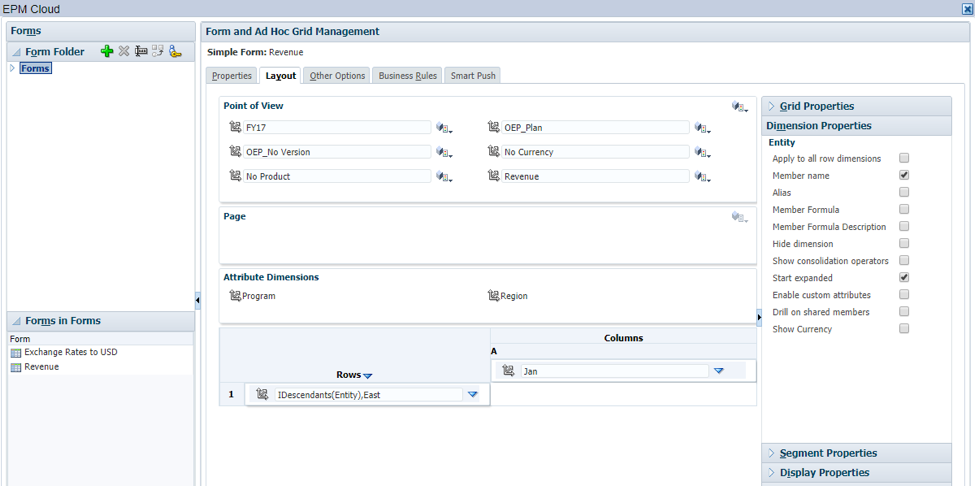
Go back to the application, open up the web form and check the result. Since we only have one entity has been assigned to East, only Massachusetts will show up in the form, other entities, like California and No Entity will not show up.

Smart View
In Smart View, open up a planning ad hoc grid.
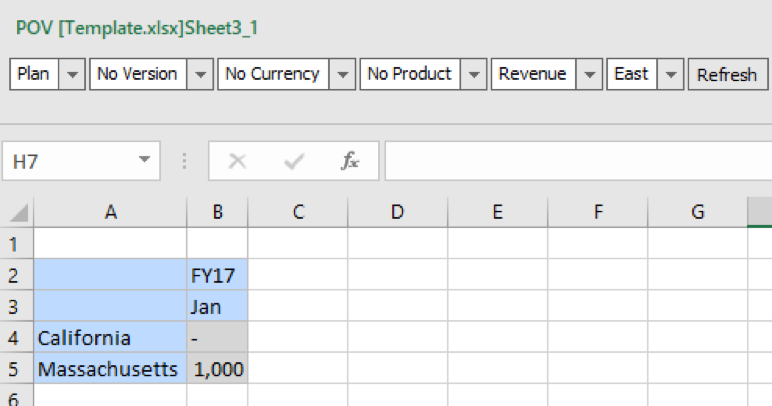
There two ways to manage attributes in Smart View. The first way is using Insert Attributes button. We retrieve the data for California and Massachusetts.
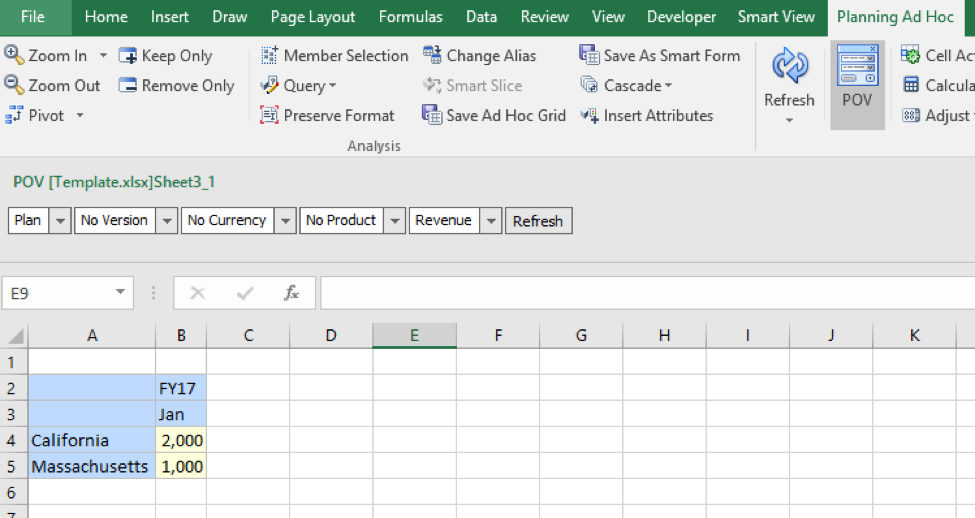
Click the Insert Attributes button.
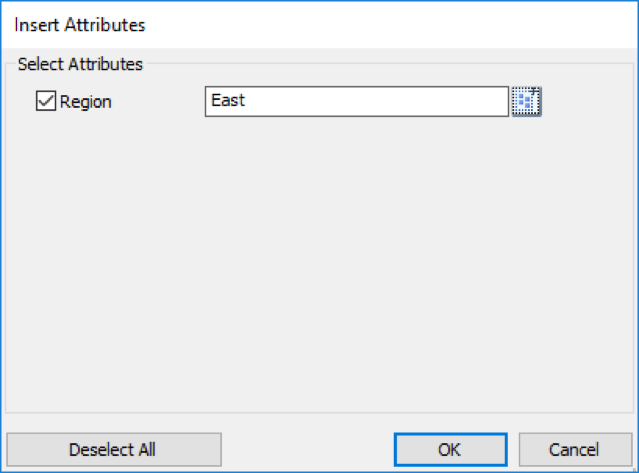
Select the East attribute.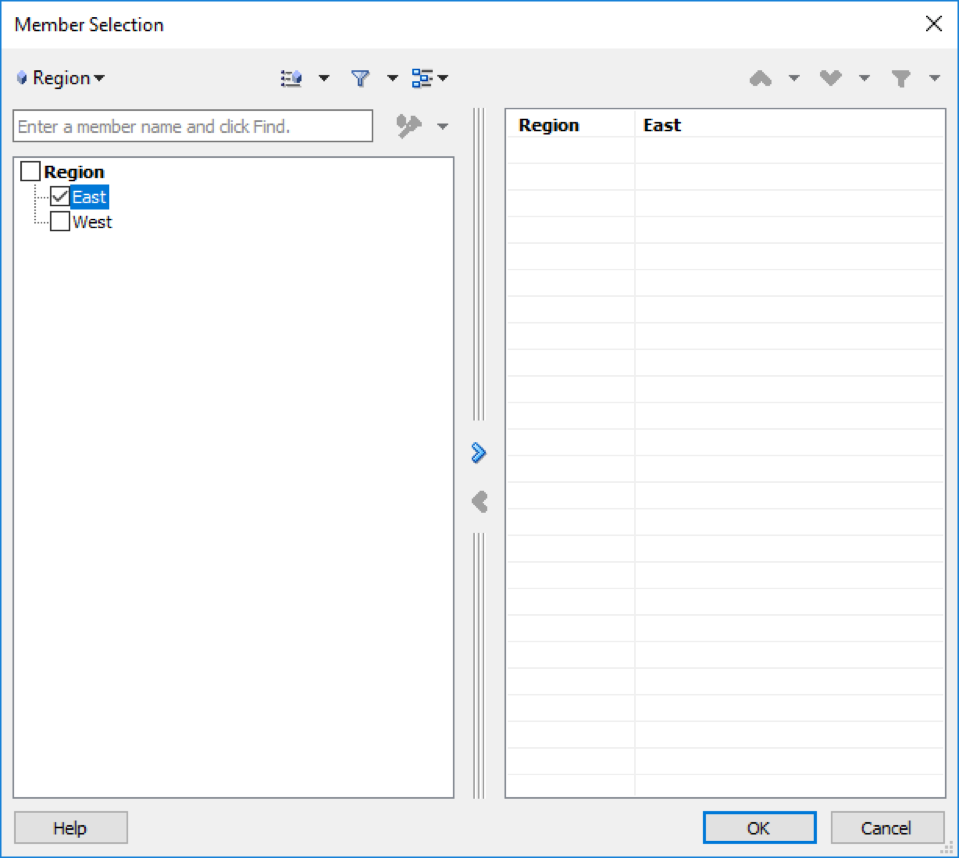
East showing up in the POV section. Since only Massachusetts has assigned East attribute, we will not see data for other entities.
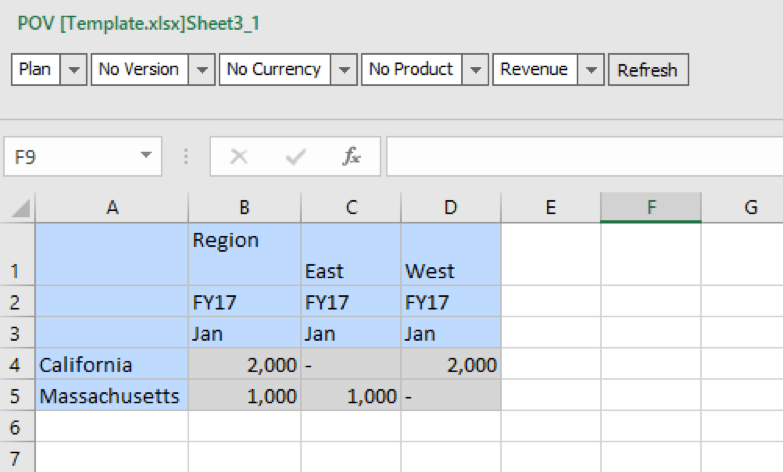
The second way to manage attributes in Smart View is just manually typing in the related attribute in to Smart View. We retrieve the same data for California and Massachusetts.
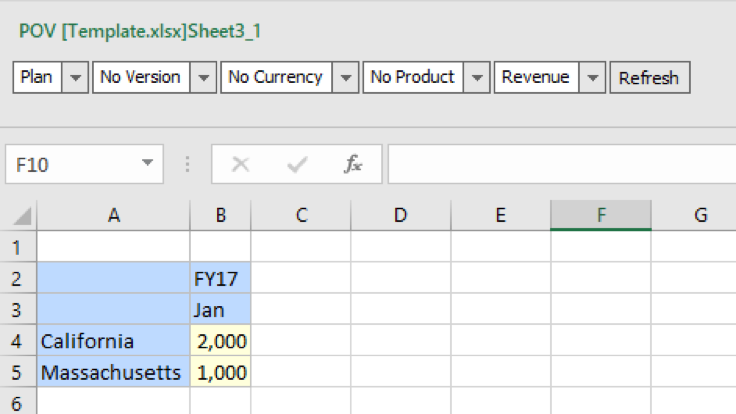
In columns, manually type in the attributes that we would like to see.
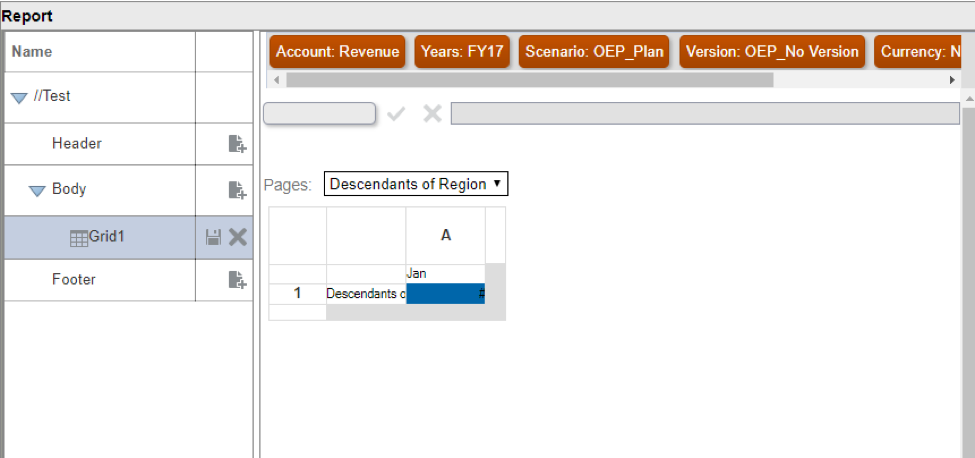
Report
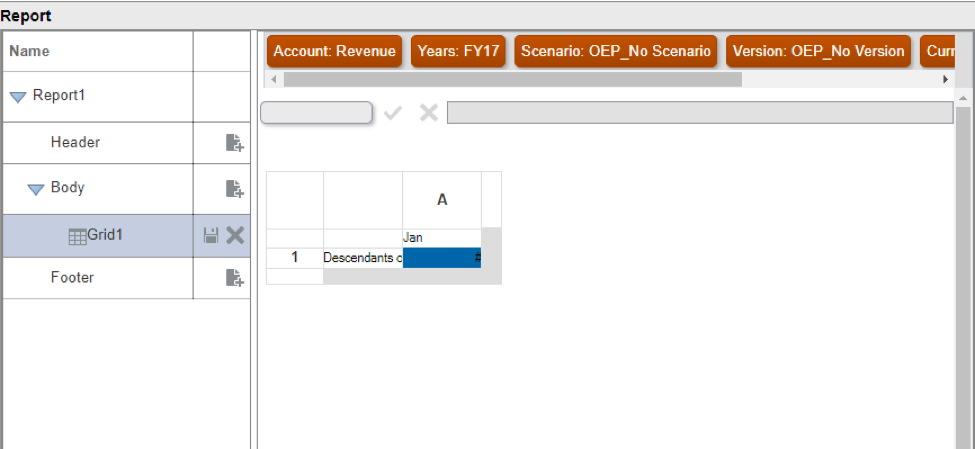
Now let’s see how to use attributes in reports. In the Dimension Layout section, we see the attribute that we have created.
Create a sample report.
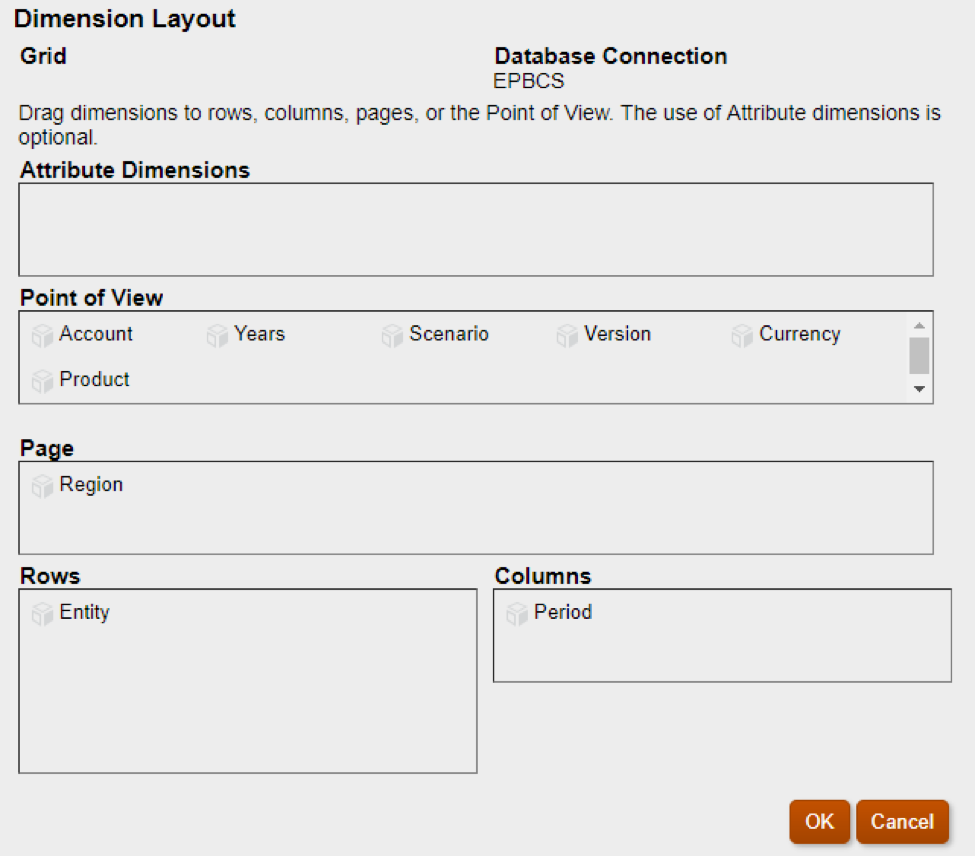
Go back to the Dimension Layout and drag the Region Dimension to the Page section.
Save the Report.
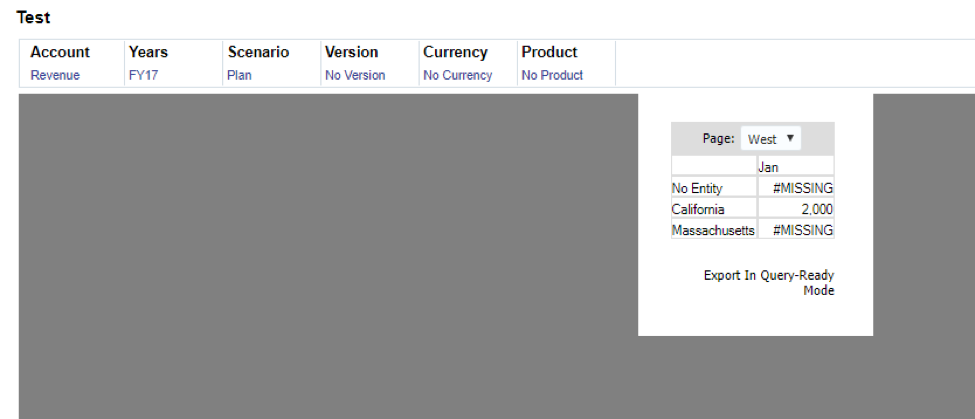
Run this report through the application home page. We notice that the East and West attributes work as we expected.

Till now, this post should give you some basic ideas on creating and using attributes in Oracle EPM products, such Planning, Essbase, EPBCS/PBCS. See you next time.
Thanks for sharing so we will be using attributes mostly for reporting purpose and looks like in cloud attributes will be only in relational database and will not be essbase olap
This is a great article. I am a huge follower of your blogs. Very helpful.
I am now facing an issue with attributes in EPBCS. There are too many in our application. How can i remove or delete them? At least a few specific ones.
I just figured it out. Thank you anyway. Your blog helped again.
This is good article.
Thank you very much.
Very Informative Article..Thanks a lot..