


Introduction
If you manage Oracle EPM Planning environments on OCI (Gen 2), knowing how to restore a backup is one of the most critical administrative skills you can have. Whether you are recovering from a bad data load, rolling back a configuration change, or simply archiving a snapshot before a major release, the restore workflow is your safety net.
For most EPM administrators, EPM Automate is the go-to command-line utility for automating environment tasks. It is well documented and widely used, but typically from a Windows machine. What is less commonly covered is how to run EPM Automate directly from macOS. If you are a Mac-based EPM admin, consultant, or developer, this post is for you.
This guide walks through the end-to-end process on macOS: installing prerequisites, configuring your environment, logging in, listing available backup snapshots, and restoring from a backup. We will cover each step with the exact terminal commands you need.
| ⚠️ Note: These instructions are for macOS administrators running EPM Automate locally. The steps assume you are targeting an OCI (Gen 2) Oracle EPM Cloud environment. |
1. Prerequisites
Before running EPM Automate on macOS, you need two things installed: Java (JDK) and EPM Automate itself.
Install Java
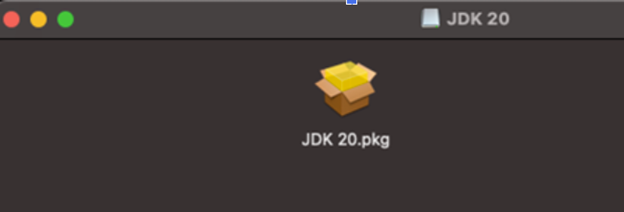
EPM Automate requires Java to run. Download and install the latest JDK from Oracle:
► Download: https://www.oracle.com/java/technologies/downloads/#jdk2x-mac
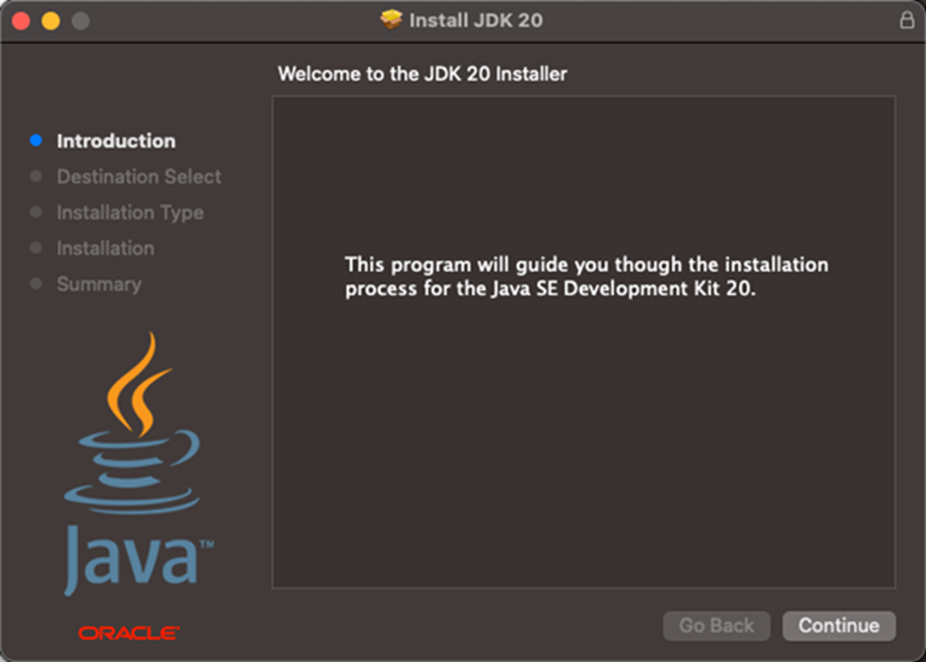
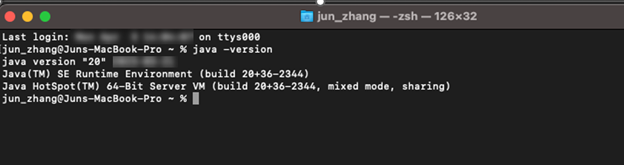
During installation, follow the standard macOS installer prompts. Once complete, verify the installation by opening Terminal and running:
| java -version |
You should see output similar to:
| java version “2x.x.x” …
Java(TM) SE Runtime Environment … Java HotSpot(TM) 64-Bit Server VM … |
Install EPM Automate
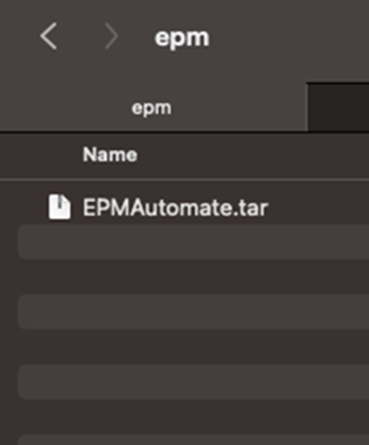
Download the EPM Automate client from the Oracle EPM Cloud downloads page and extract it to a local directory on your Mac. A common location used in practice is:
| /Users/<your_username>/Documents/epm/epmautomate/ |
The key executable you will use is epmautomate.sh, located inside the bin/ subdirectory.
2. Login to EPM Planning Environment
Open Terminal
Go to Spotlight Search (Cmd + Space) and type Terminal, then press Enter to open the Terminal application.

Once Terminal is open, navigate to your EPM Automate bin directory (or set up your PATH as shown in the next step so you can call epmautomate.sh from anywhere).
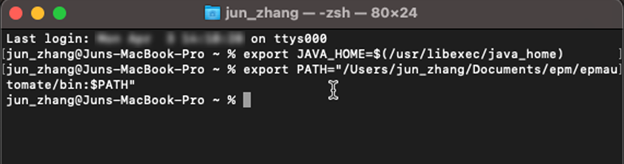
Set JAVA_HOME and PATH
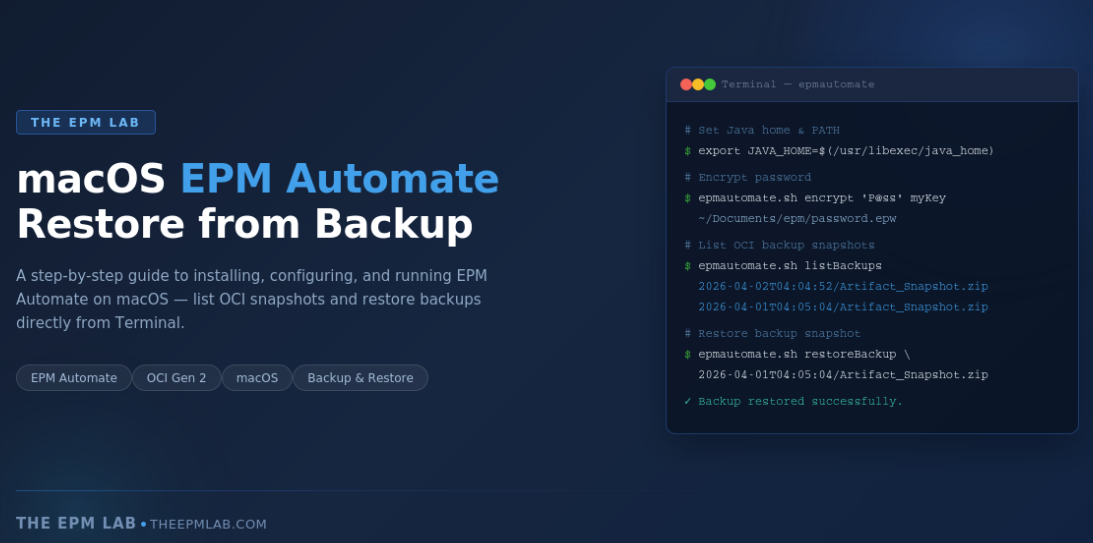
Before running any EPM Automate commands, you need to configure your Java environment and add the EPM Automate bin directory to your system PATH. Paste the following commands into Terminal and press Enter after each:
| export JAVA_HOME=$(/usr/libexec/java_home)
export PATH=”/Users/<your_username>/Documents/epm/epmautomate/bin:$PATH” |
Replace <your_username> with your actual macOS username. These settings apply to the current Terminal session. If you find yourself running EPM Automate frequently, consider adding these lines to your ~/.zshrc or ~/.bash_profile so they persist across sessions.
Encrypt Your Password
EPM Automate supports encrypted password files so you do not have to pass your password in plain text. To create an encrypted password file, run:
| epmautomate.sh encrypt ‘<your_password>’ myKey /Users/<your_username>/Documents/epm/password_oci.epw |
This generates an encrypted .epw file at the specified path. You will reference this file during login instead of typing your password directly.
| 🔒 Security Tip: Always use encrypted password files in practice. Avoid passing plain-text passwords inline, especially in shared scripts or automated workflows. |

Login to the EPM Environment
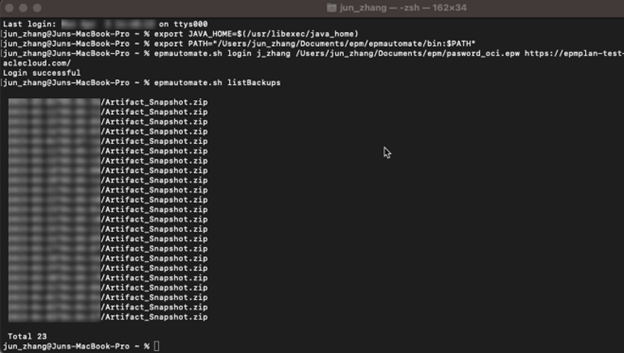
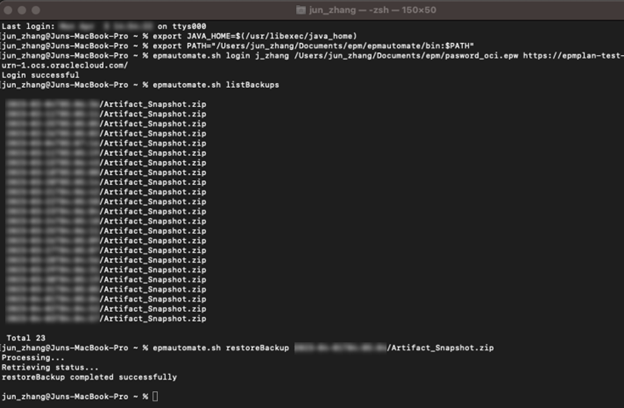
With your JAVA_HOME, PATH, and encrypted password file ready, log in to your EPM environment using the following command:
| epmautomate.sh login <username> /Users/<your_username>/Documents/epm/password_oci.epw <EPM_URL> |
For example:
| epmautomate.sh login user1 /Users/user1/Documents/EPM/password_OCI.epw \
https://epmplan-test-myorg.epm.us-ashburn-1.ocs.oraclecloud.com/ |
A successful login returns a confirmation message in the terminal. You are now authenticated and ready to issue EPM Automate commands against your environment.

3. List Backups and Restore
List Available Backups
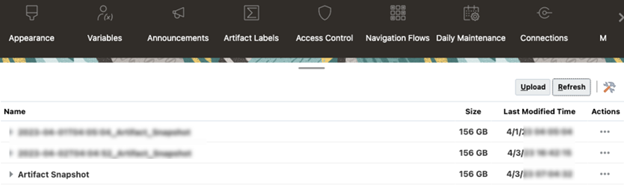
Oracle OCI (Gen 2) environments automatically snapshot your environment on a scheduled basis. To see what backup snapshots are available, run:
| epmautomate.sh listBackups |
This command returns a list of available backup snapshots for the connected OCI environment. The output looks something like:
| 2026-04-02T04:04:52/Artifact_Snapshot.zip
2026-04-01T04:05:04/Artifact_Snapshot.zip 2026-03-31T04:04:47/Artifact_Snapshot.zip … |
Each entry represents a timestamped backup snapshot stored in Oracle Object Storage. Note down the snapshot name you want to restore — you will pass it as a parameter in the next step.
| 💡 Tip: Review the snapshot timestamps carefully before restoring. The naming format is YYYY-MM-DDTHH:MM:SS/Artifact_Snapshot.zip. Select the snapshot that corresponds to the state you want to restore to. |
Restore from Backup
Once you have identified the target snapshot, use the restoreBackup command to copy it from Oracle Object Storage into your OCI environment, making it available for import:
| epmautomate.sh restoreBackup <SNAPSHOT_NAME> |
For example:
| epmautomate.sh restoreBackup 2026-04-01T04:05:04/Artifact_Snapshot.zip |
This command triggers the restore process. Depending on the size of your snapshot, this can take several minutes. The terminal will display progress messages, and upon completion you will see a confirmation that the backup has been restored from Oracle Object Storage to your OCI environment.
Import the Restored Snapshot
Restoring the backup copies it into the environment — but it does not automatically apply it. The final step is to import the snapshot using the importSnapshot command. You can import the complete snapshot or select specific artifacts depending on your requirements:
Import the full snapshot:
| epmautomate.sh importSnapshot Artifact_Snapshot |
Import with selective exclusions (e.g., skip users and groups):
| epmautomate.sh importSnapshot Artifact_Snapshot userPassword=false importUsers=false |
After the import completes, verify your environment to confirm the restored state is as expected. Log into the Planning web UI and validate key artifacts, data, and configurations.
4. Command Reference Summary
The table below provides a quick reference for the EPM Automate commands covered in this post:
| Action | Command | Description |
| Login | epmautomate.sh login | Authenticates to EPM environment |
| Encrypt Password | epmautomate.sh encrypt | Creates encrypted .epw password file |
| List Backups | epmautomate.sh listBackups | Lists OCI backup snapshots |
| Restore Backup | epmautomate.sh restoreBackup <name> | Copies snapshot from Object Storage |
| Import Snapshot | epmautomate.sh importSnapshot | Imports snapshot into environment |
Final Thoughts
Running EPM Automate on macOS is straightforward once your environment is properly configured. The key steps are: install Java, set JAVA_HOME and PATH in your Terminal session, encrypt your credentials, and use epmautomate.sh just as you would on Windows.
For OCI (Gen 2) environments, the listBackups and restoreBackup commands are powerful tools for self-service recovery. Whether you are an EPM consultant working from a Mac or an admin who prefers a Unix-based workflow, this approach gives you full control over your environment’s backup and restore lifecycle directly from the command line.
Combine this with scheduled shell scripts and you have the foundation of a lightweight, Mac-native EPM automation toolkit.