


Data Load
In this section, let’s take a look at how to load and validate data in FDMEE and then export the data to other Oracle products, such as Planning.
Data Load – Workbench
System Settings
Before using FDMEE, we must register the source system from which you want to import data. Then register the target application, such as Planning to which you want to load the data from one or more source systems.
On the Setup tab, under Configure, select System Settings
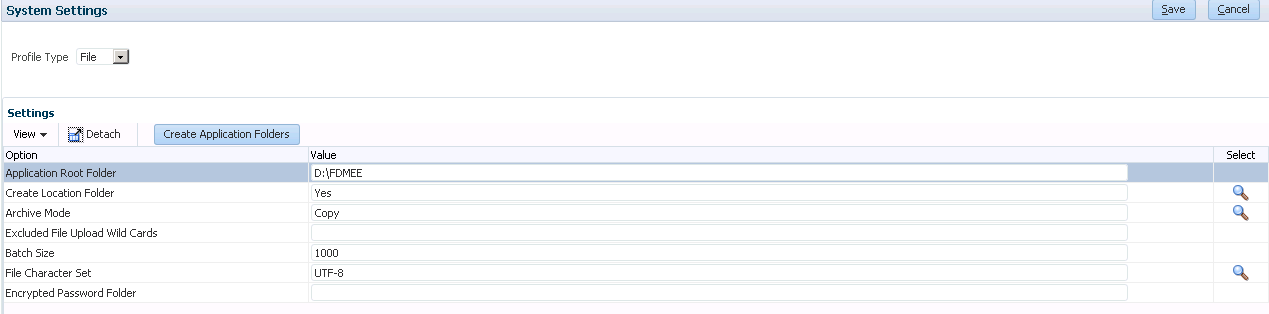
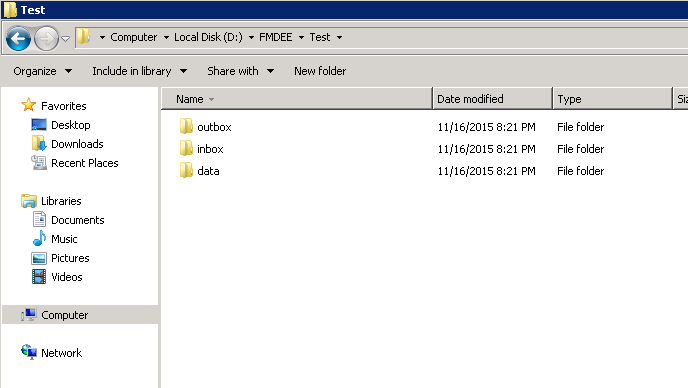
Define path for application root folder, in this case, the path is D:/FDMEE
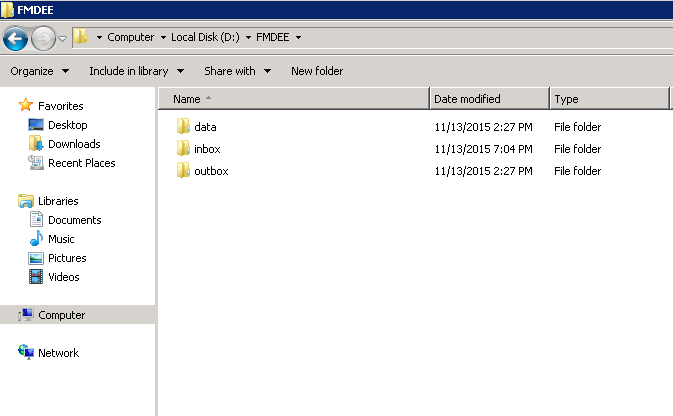
Click Create Application Folders button, then FDMEE will create three folders automatically, which are data, inbox and outbox. Click Save.
Application Settings
On the Setup tab, under Configure, select Application Settings
Pick target application, then define the target application folder where planning application is going to store data files.
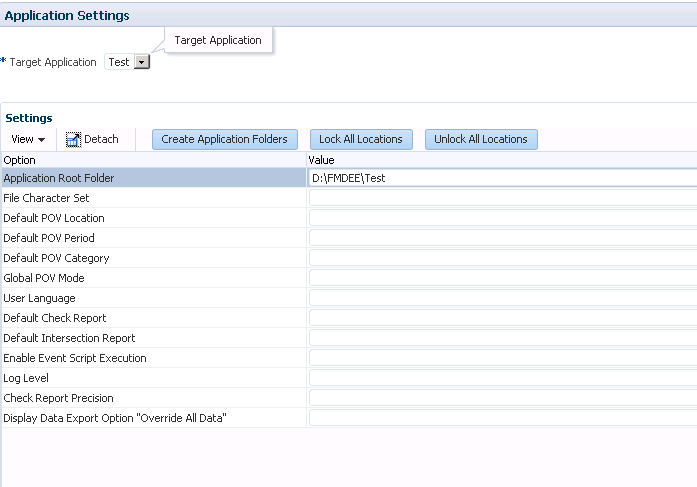
Similarly, click Create Application Folders button, then FDMEE will create three folders automatically, which are data, inbox and outbox. Click Save.
Define Source System
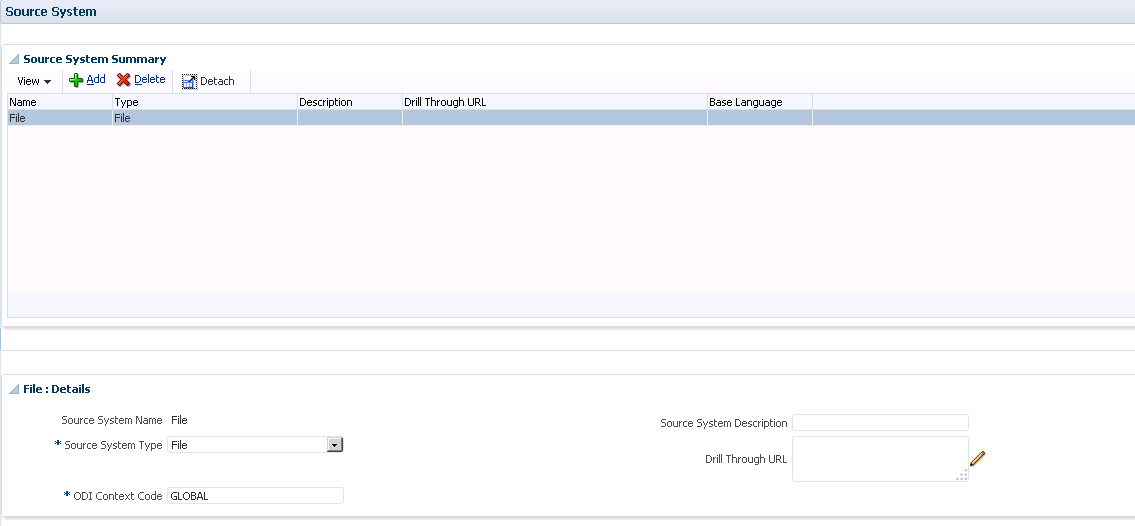
On the Setup tab, under Register, select Source System.
The sources system type can be eBS 11i, eBS 12, File, Fusion Applications, Fusion Budgetary Control, JD Edwards Enterprise One, Others, PPSoft 9, and SAP.
In this case, we choose File. ODI Context Code is Global. Also, users can define the URL for drill through.
Define Target Application
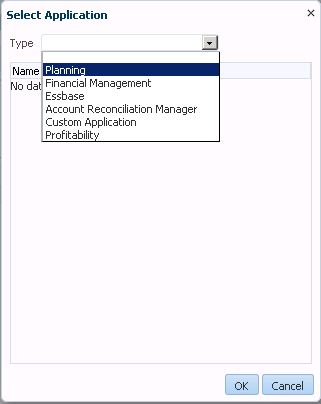
On the Setup tab, under Register, select Target Application.
Click Add, then select Planning, click the application name you need.
In the Application Details grid for the target application, specify the dimension details. The Dimension Details tab shows the dimensions in the Planning application. In this case Test application has 6 dimensions, which are Account, Entity, Period, Scenario, Version and Year.
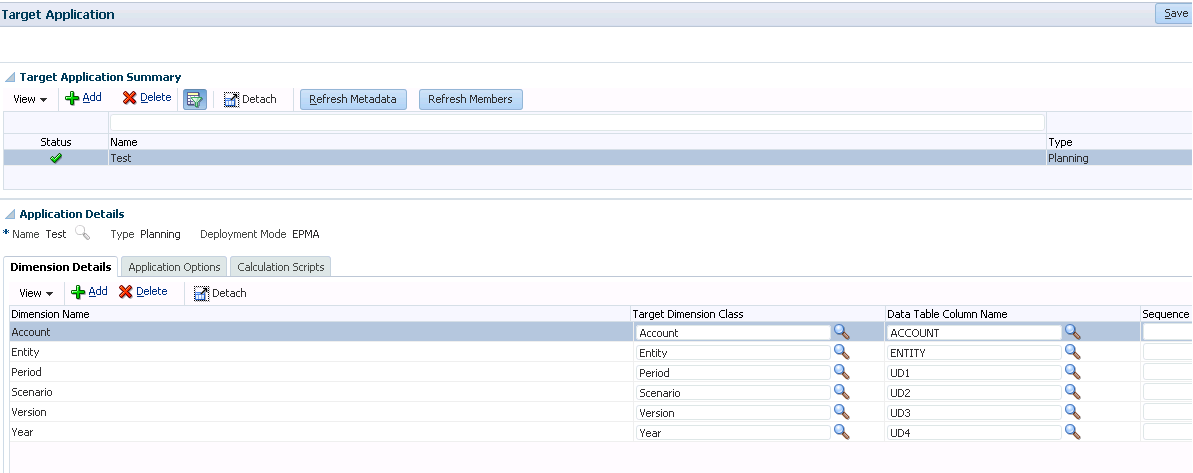
The Application Options tab show the available options for the Planning Application. If set the Drill Region to Yes, then you will be able to drill through to the source file or system.

Import Format
In FDMEE, create an import format based on the source type that you want to load to the target application. The import format defines the layout of source data.
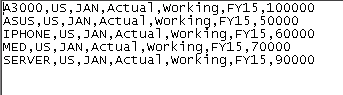
In this guide documentation, define the layout of a source data file that includes fields delimited by a comma. The following columns are included in the file:
Account, Entity, Period, Scenario, Version, Year, Amount.
The following displays the data file.
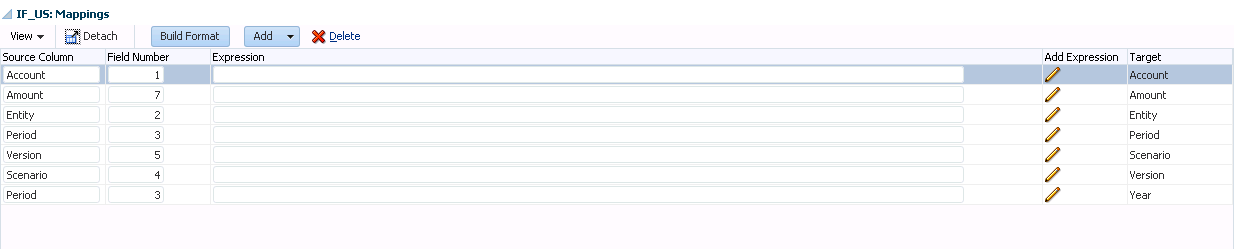
In the import format, define the location of these columns and map them to dimensions in the target application.
Under Integration Setup, select Import Format
Click Add to add an import format, then define details for the new Import Format
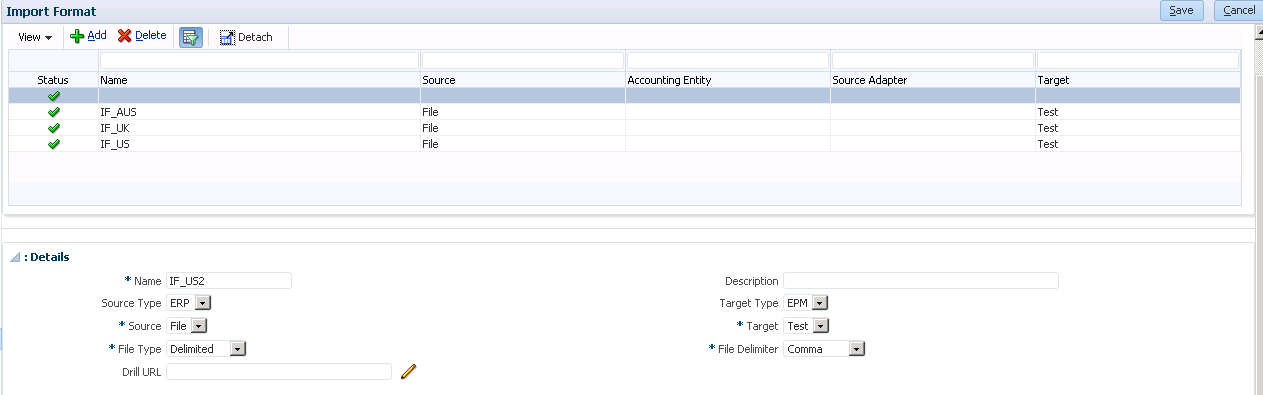
There are two Source Types: ERP and EPM. In this case, we use flat file as source file, so pick ERP. If the source is Planning, HFM or other applications, then pick EPM. The File Type is Delimited, File Delimiter is Comma, and Target application is Test. Users can also specify the URL for drill through.
In the Mappings grid of the import format, you map the columns in the source data-load file to the dimensions in the target application.
Location
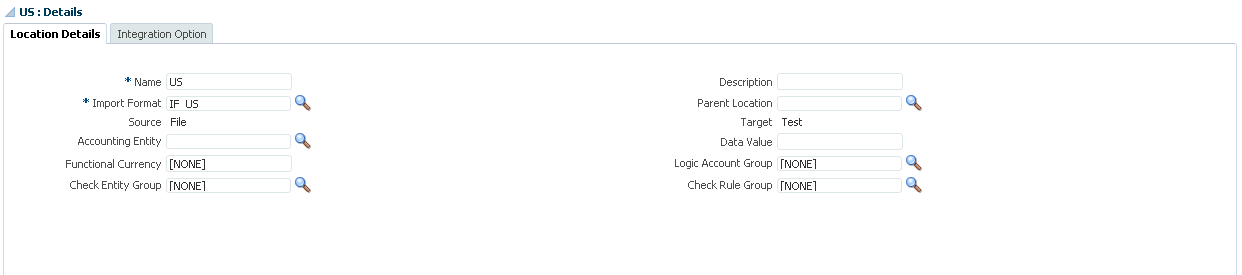
After defining the import format, create a location and specify the import format for the location. The location combines related mapping and data load rules into a logical grouping.
Under Integration Setup, select Location, add click Add to add a location.

In the Details grid, define the location name and the associated import format. The system automatically populates the Target Application and Source System for you.
Period Mapping
Define period mappings in FDMEE to map your source system data to Period dimension members in the EPM target application.
Under Integration Setup, select Period Mapping. Define period mappings at the Global, Application, and Source System levels.
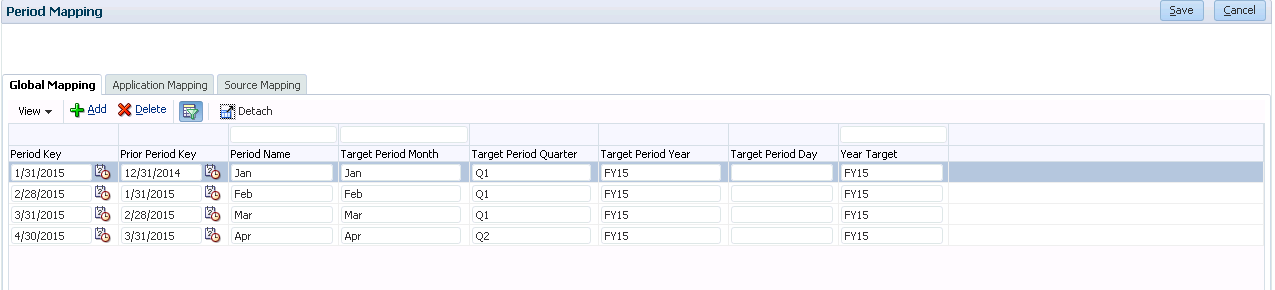
If the periods to which you want to load data do not exist, you must create them.
Category Mapping
Define category mappings to map source system data to target Scenario dimension members.
Under Integration Setup, select Category Mapping.

If the categories to which you want to load data do not exist, you must create them.
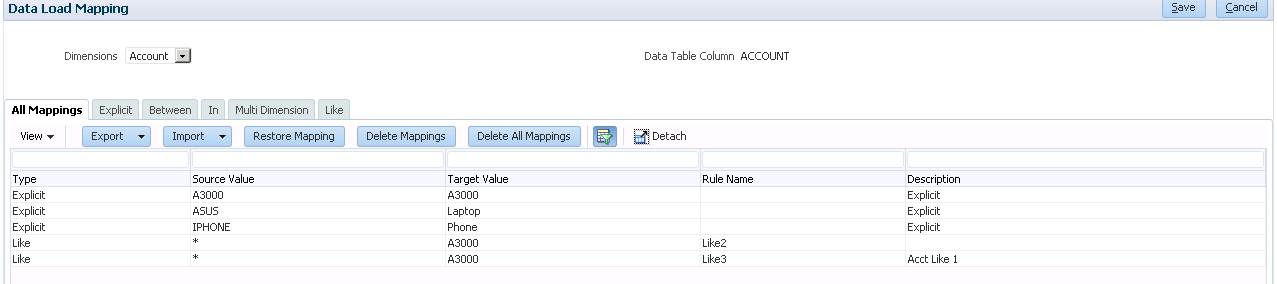
Data Load Mapping
Create data load mappings in FDMEE to map source dimension members to their corresponding target application dimension members. Defile the set of mappings for each combination of location, period, and category to which you want to load data.
On Workflow tab, under Data Load, select Data Load Mapping.
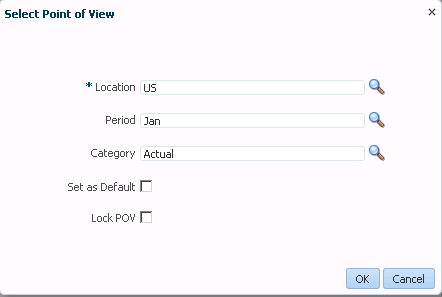
Select the Point of View (POV) to define the data load mappings for a specific location, period, and category. At the bottom of the page, click the current location name and define the POV in the Select Point of View dialog box.
On the Data Load Mapping page, define the mappings for each dimension.
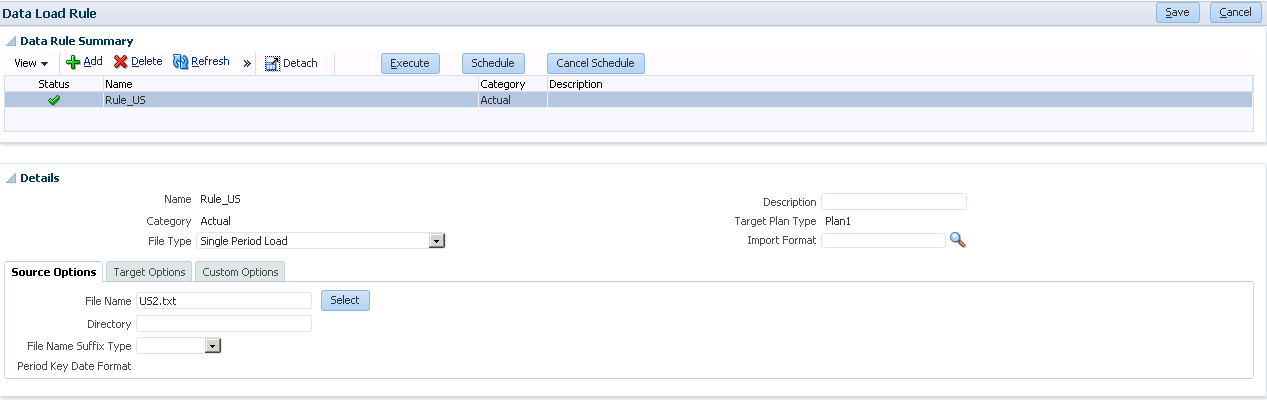
Data Load Rule
Create a data load rule for a specific location and category to define what you want to import from the source system. For example, the data load rule defines the file that you want to import in addition to other details. After creating the data load rule, execute it to import the data for one or more periods. Then verify that the data was imported and transformed correctly, and then export the data to the target application.
On Workflow tab, under Data Load, select Data Load Rule.
Click Add to add a data load rule. In the Details grid, specify the data load rule name, and select the data load file name.
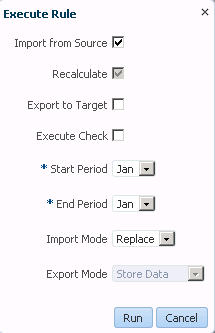
With the rule selected, click Execute. In the Execute Rule dialog box, define the options for running the rule.
Only check the box labeled “import from source” so you can look at the data and the mapped results in the workbench prior to loading the data to Planning. After everything is confirmed, additional data imports can load to the workbench and export to Planning.
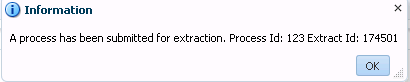
An Information dialog box displays your process ID.
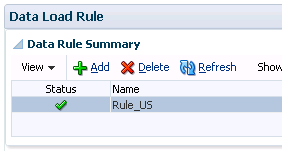
Then wait couple minutes. When it is done and successful, a green check mark will show up.
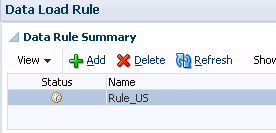
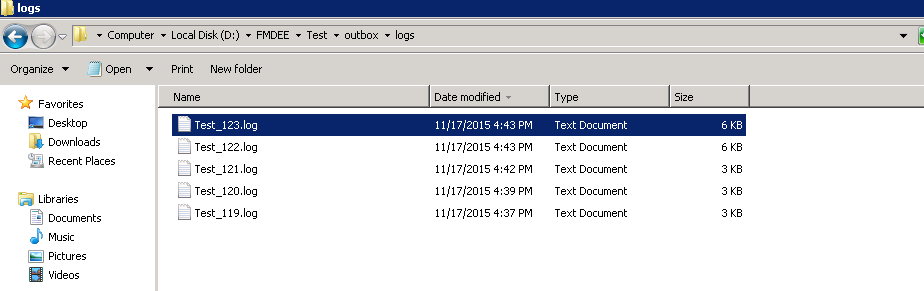
To verify the status of the process, there are two ways to check the log file.
- On the Workflow tab, under Monitor, select Process Details. A green check mark indicates success for the Process ID.

Click Show to check the log file.
- Go to the Application folder, under outbox\logs, find the related log file.
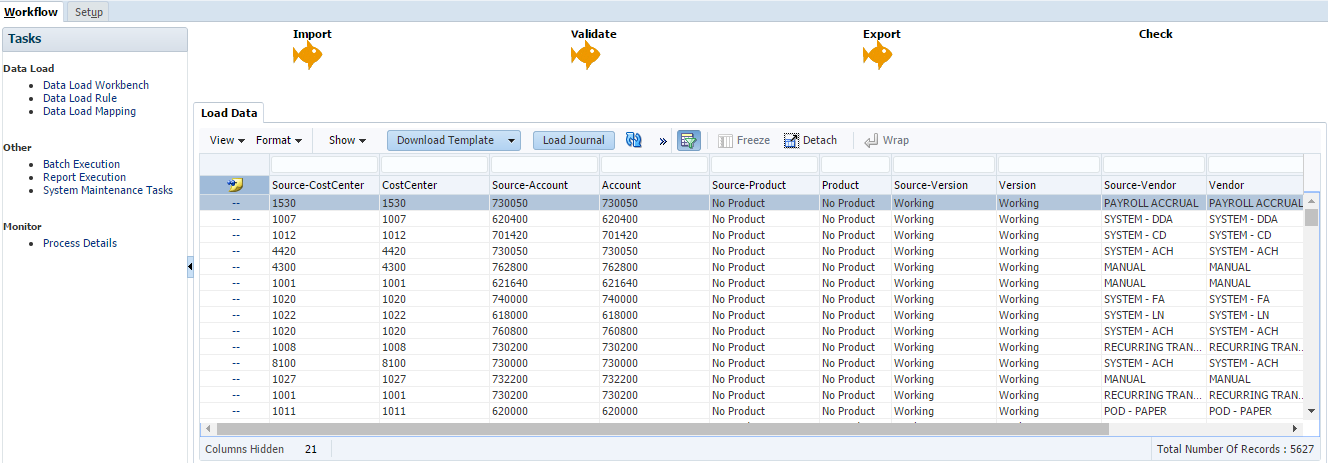
Data Load Workbench
Check the data load results and the mapping process in Data Load Workbench.
Under Data Load, select Data Load Workbench.
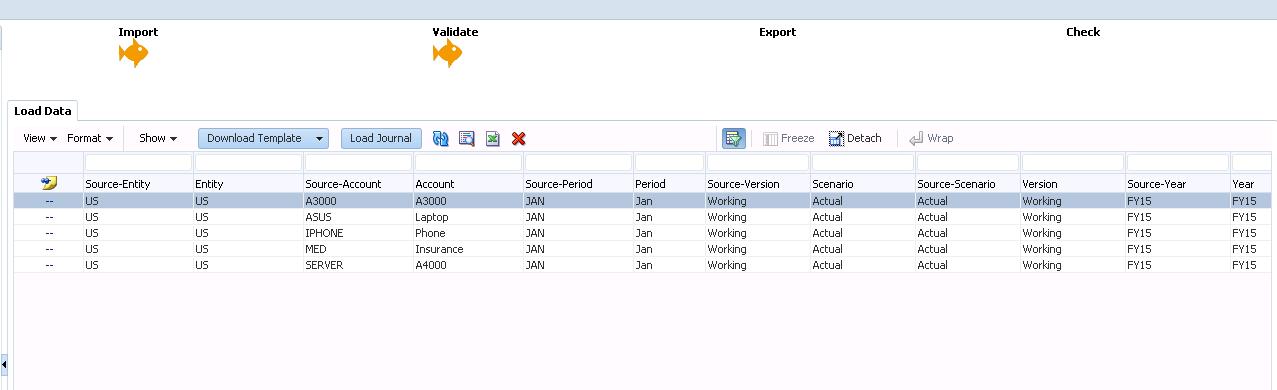
The Load Data tab displays the imported data. At the top of the page, the Import and Validate tasks display a gold fish, which indicate a successful import and validation.
During validation, FDMEE applies data load mappings to map source members to target members. When validation errors occur during the Validate task, a Validation tab displays the unmapped source members and you will get a red cross mark and a grey fish.
![]()

Users must review the unmapped source members and then, in the Data Load Mapping task, adjust the mappings to correct all errors. After correcting the errors, execute the data load rule again and check the results in Data Load Workbench.
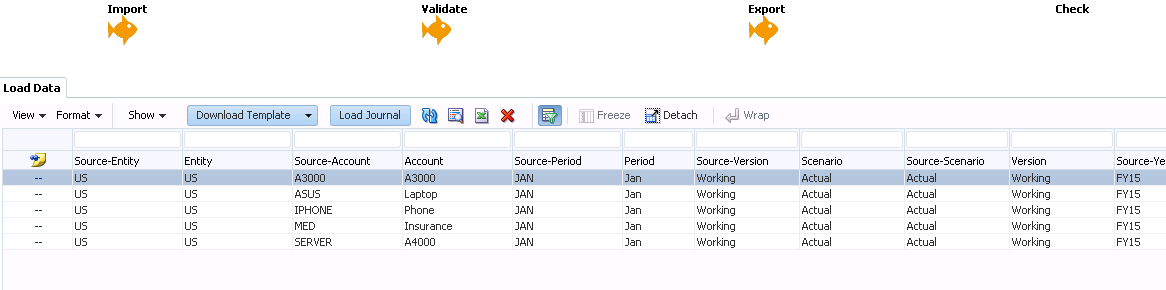
After a successful load, click Export to load the data to the target application. Select the desired load options, and then click OK.
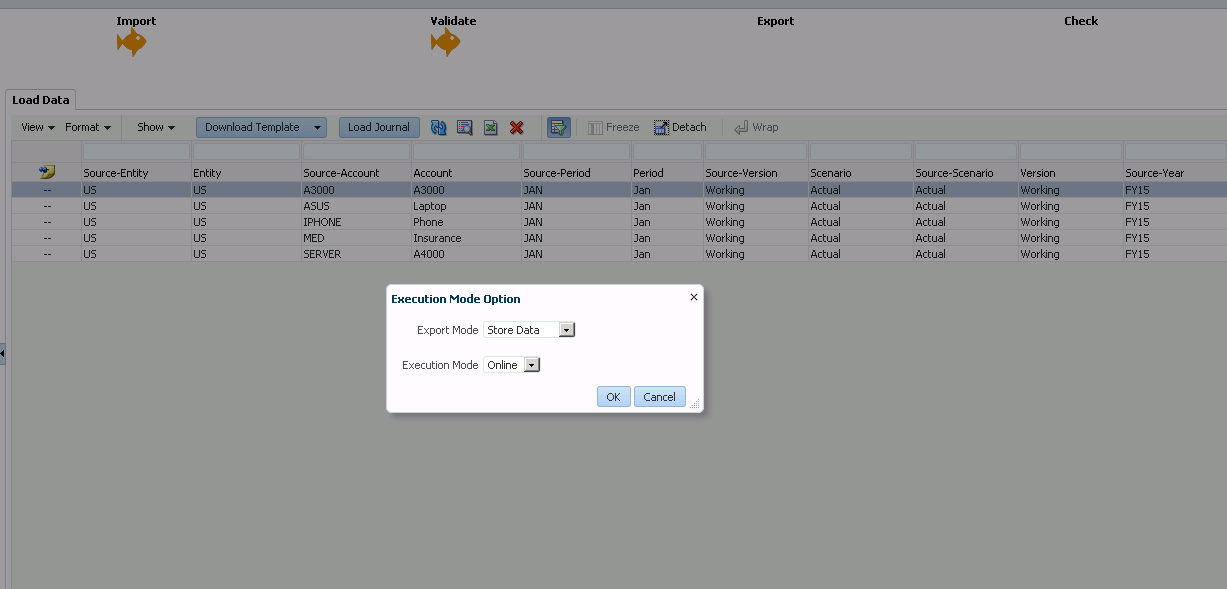
When complete, the icon will change to indicate a successful load.
I will discuss more about FDMEE in the future blogs.
Check FDMEE – User Guide 1 – About FDM for more information.