


As we know, Smart View is an Office add-in, which provides a common Office interface for EPM products. Through Smart View, we are able to link to the on-premise Hyperion, Essbase, PBCS, and other EPM applications. We can view, import, distribute data in Excel, Word and PowerPoint.
But you may or may not know that there is a Smart View Planning Admin Extension, which allows us to maintain metadata in Excel, including updating hierarchy, refreshing database, etc. With that being said, there is no need for admins to log into the web application to maintain the hierarchy, we could achieve this through Excel for the most cases. Today, let’s focus on how to use Planning Extension to manage metadata.
Install & Enable Planning Extension
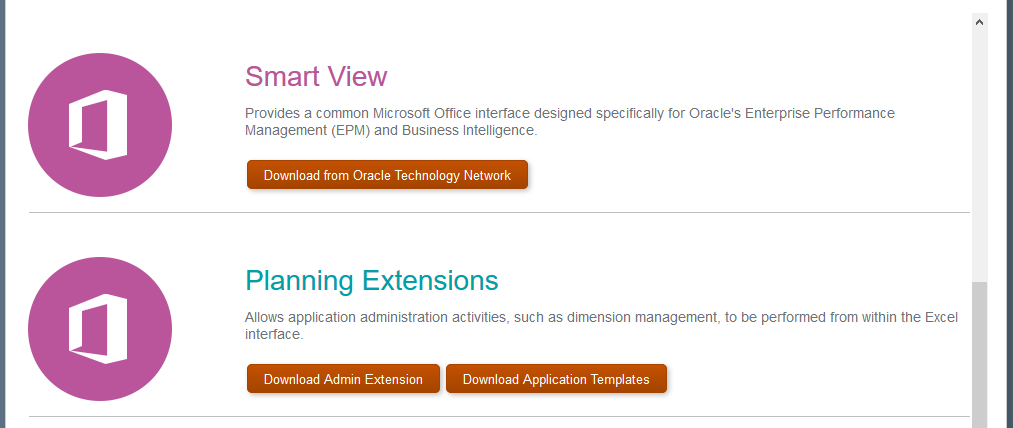
The Planning Extension can be downloaded from EPM application web homepage.
Let’s create a standard PBCS application.

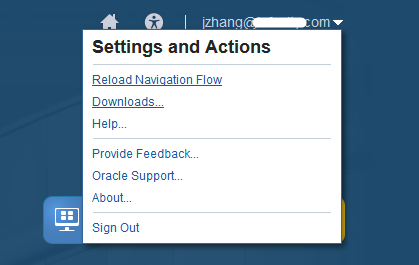
On the home page, click the drop down button next to the user ID, then select Downloads.
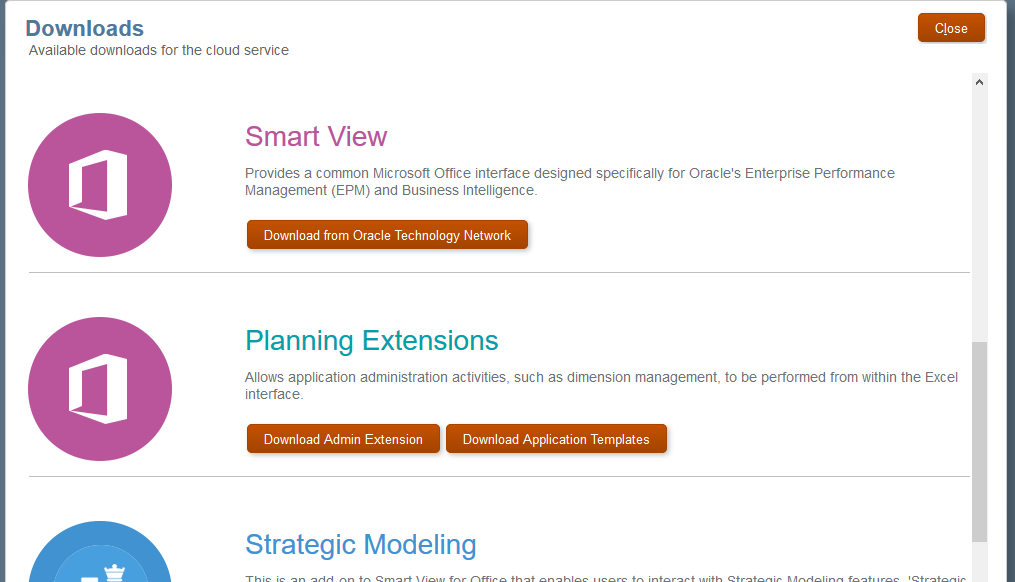
We will need to download the Planning Extensions.
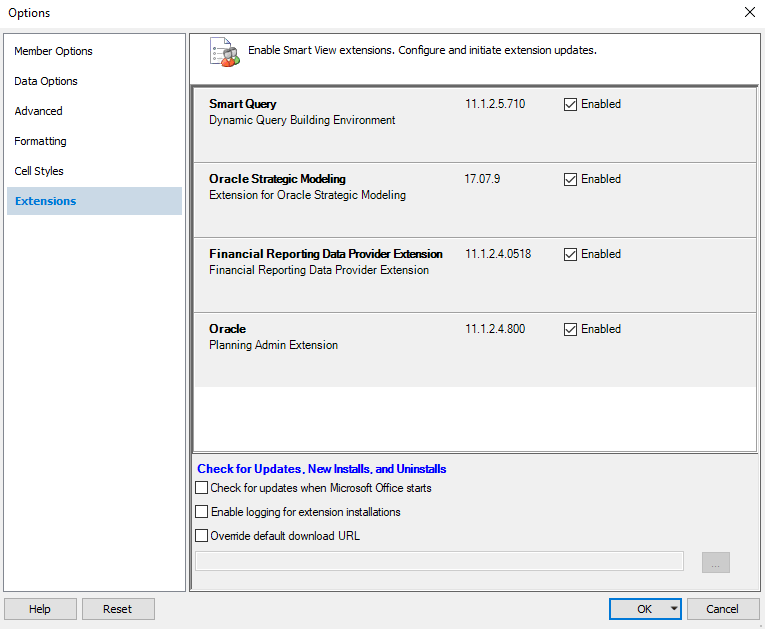
Then follow the instructions via the installation wizard.

After installation, launch Excel. Firstly, we would like to check that the Planning Admin Extension got enabled.
Maintain Metadata
Edit Member
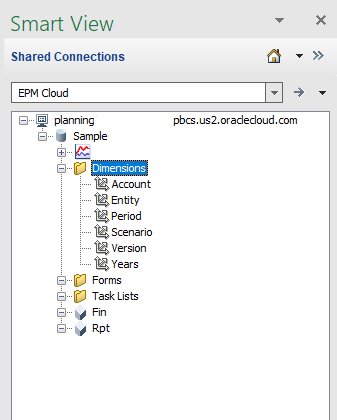
Establish a Smart View Connection Planning connection and link to the Sample application by using the planning connection.
We will notice that there is a Dimension folder. All the dimensions are stored in this folder.
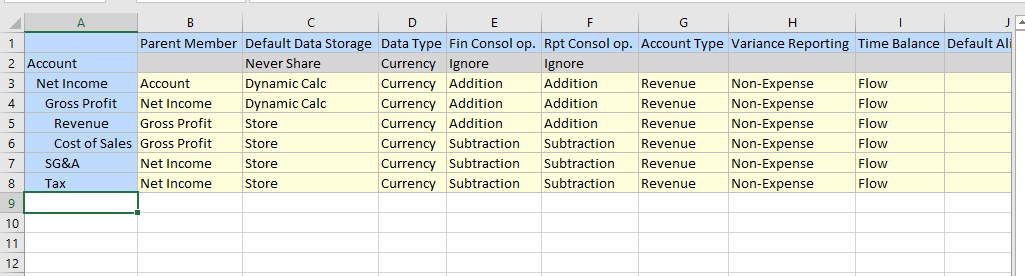
Double click on one of the dimension or right click then select Edit dimension. For example, let’s edit Account dimension.
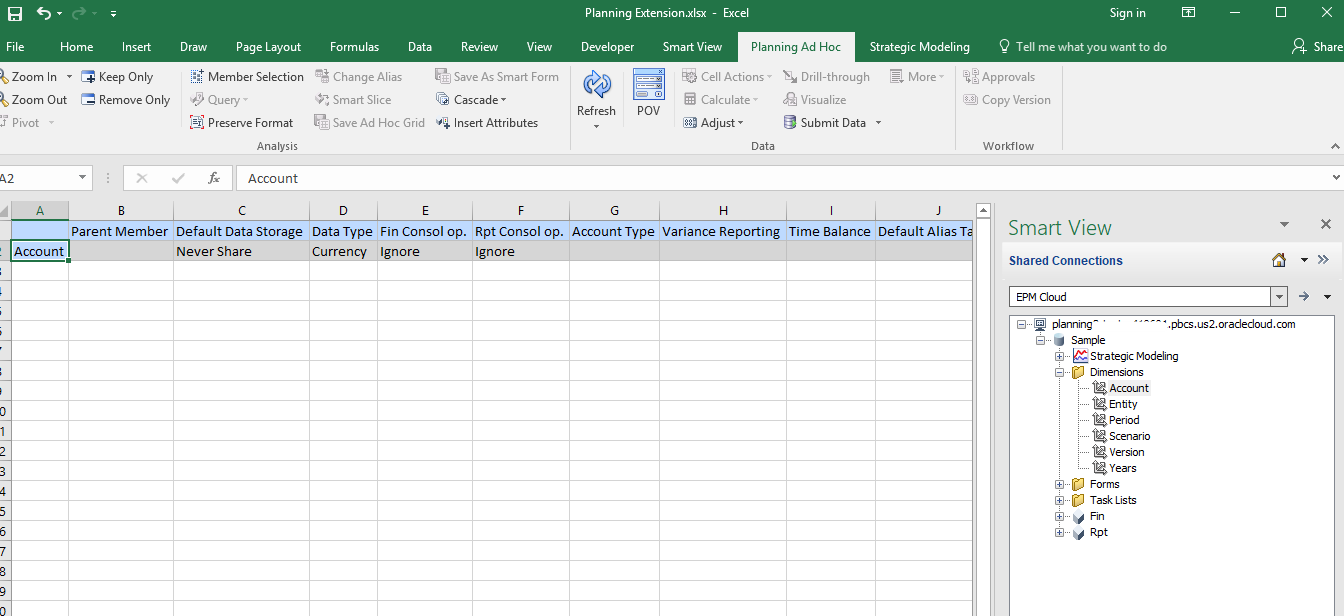
Double click on the Account dimension. We see that the top member of the dimension cannot be edited, so the properties will be grayed out. Others are editable.
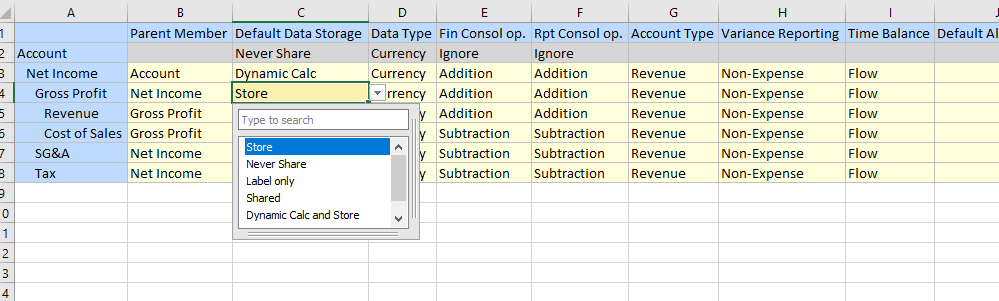
Some properties have a drop down menu, just like the web version, for example, Data Storage.
For others, we could just manually type in the value, for example, Parent Member.
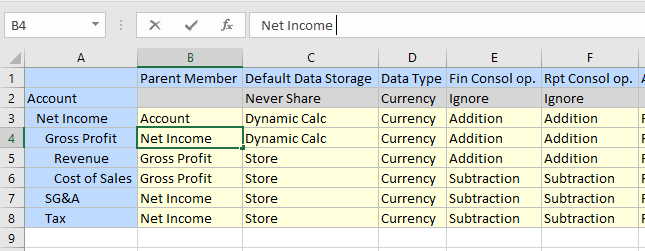
Then Submit the changes.
Add New Member
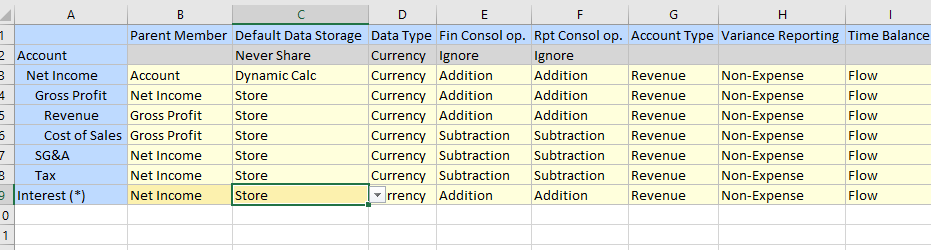
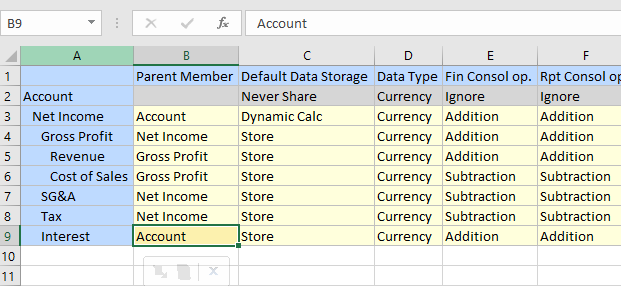
Enter a new member name in the first column and then click Refresh. The new member is marked with a *, and the default properties will be displayed. We could edit those default properties. Then submit the changes.
Move Member
Click on the Parent Member, then type in a new parent member name. Then submit the changes.
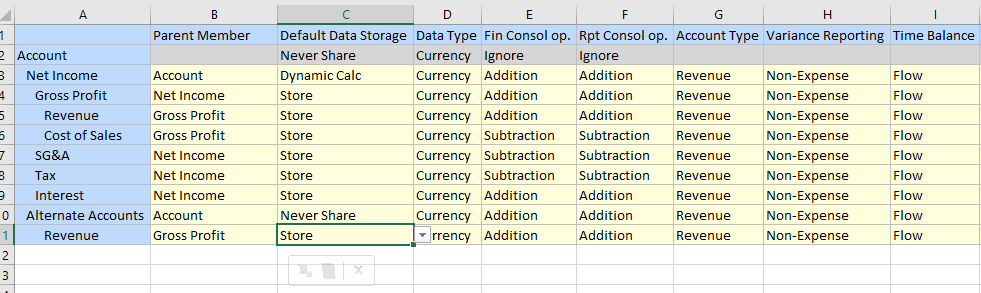
Shared Member
Add the member as a shared member to a new shared member row. Type in the Parent Member name and Set the Data Storage property as Shared. Then Submit the changes.
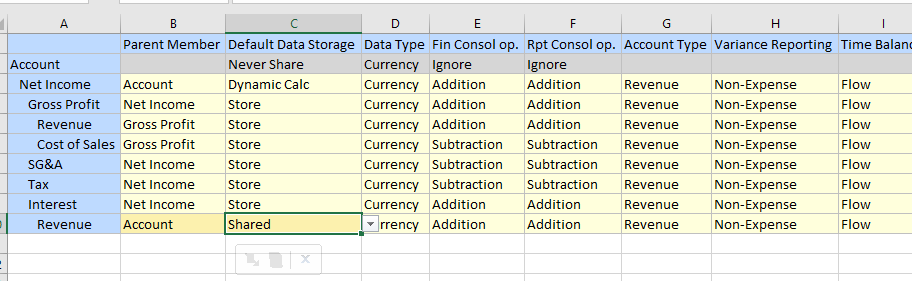
When we click Refresh, we notice that the Parent Member and Data Storage have changed back. But, actually, this member has been added as a shared member correctly.
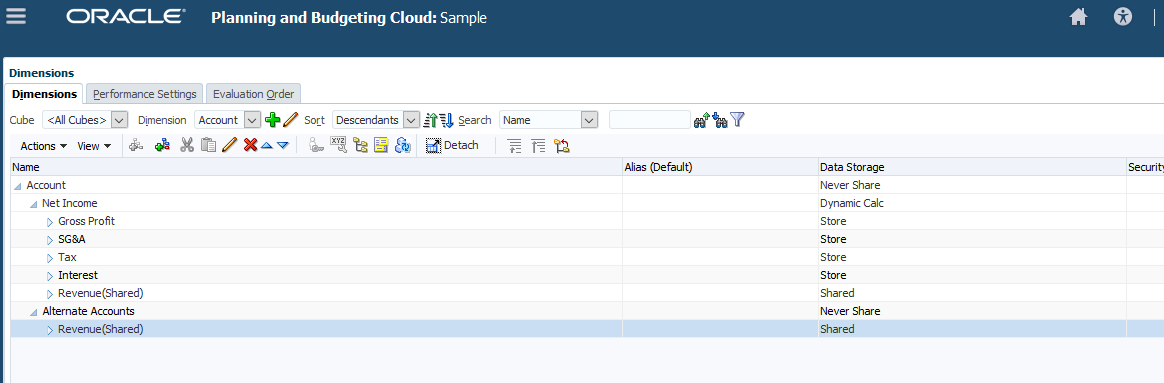
Let’s check the web version to make sure everything has been set up correctly.
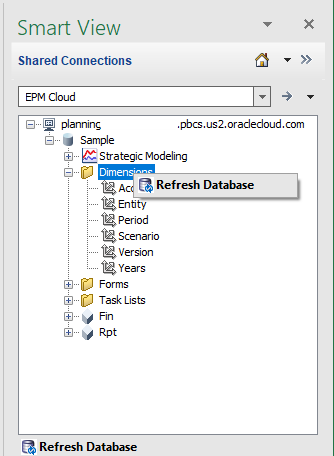
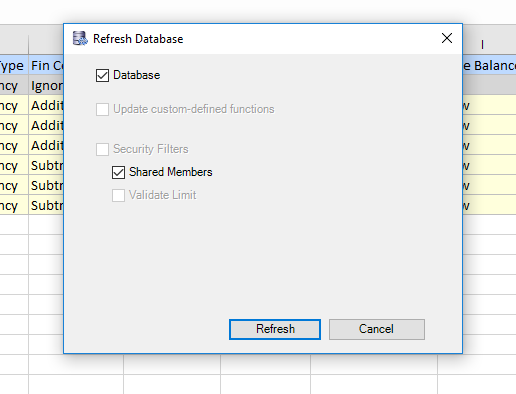
Refresh Database
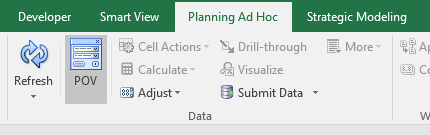
All changes to metadata require Essbase to be refreshed. Essbase can be refreshed from Smart View.
Right click on the Dimension folder, and then select Refresh Database.
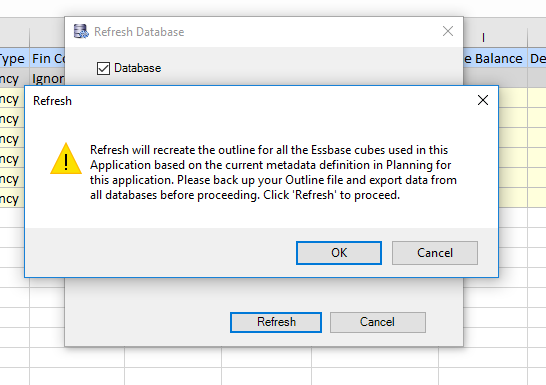
Check the Database checkbox and click the Refresh button.
Then click OK.
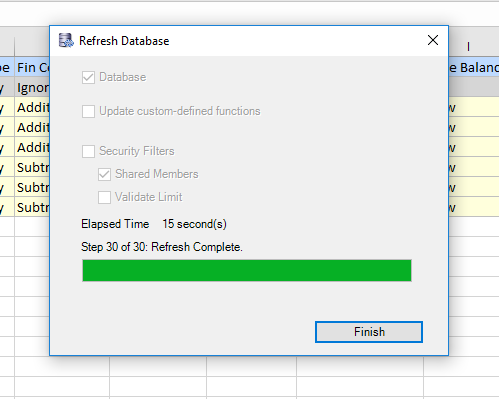
When the database is refreshed, click Finish.
Hope this post could give you some ideas on how to use Planning Extension to manage metadata in Excel. In the future posts, I will discuss something other Office add-ins. See you next time.
How do you edit a member name? Everytime you try it creates a new member instead of changing the member name….. Stumped. I tried adding the ‘Operation’ column to no avail.