


In this blog, I will walk through the Projects prebuilt framework in Enterprise Planning Cloud (EPBCS), including how to configure the Projects framework, and how to use this framework.
Before we start discussing the Projects framework, hope you already had a chance to read other blogs in this series.
EPM Cloud Lab – Configure Prebuilt Frameworks 1 – Financials
EPM Cloud Lab – Configure Prebuilt Frameworks 2 – Workforce
EPM Cloud Lab – Configure Prebuilt Frameworks 3 – Capital
EPM Cloud Lab – Configure Prebuilt Frameworks 4 – Projects
EPM Cloud Lab – Configure Prebuilt Frameworks 5 – Strategic Modeling
From the above blogs, you will get some high-level ideas and background knowledge on all of these prebuilt frameworks.
Configure Projects Framework
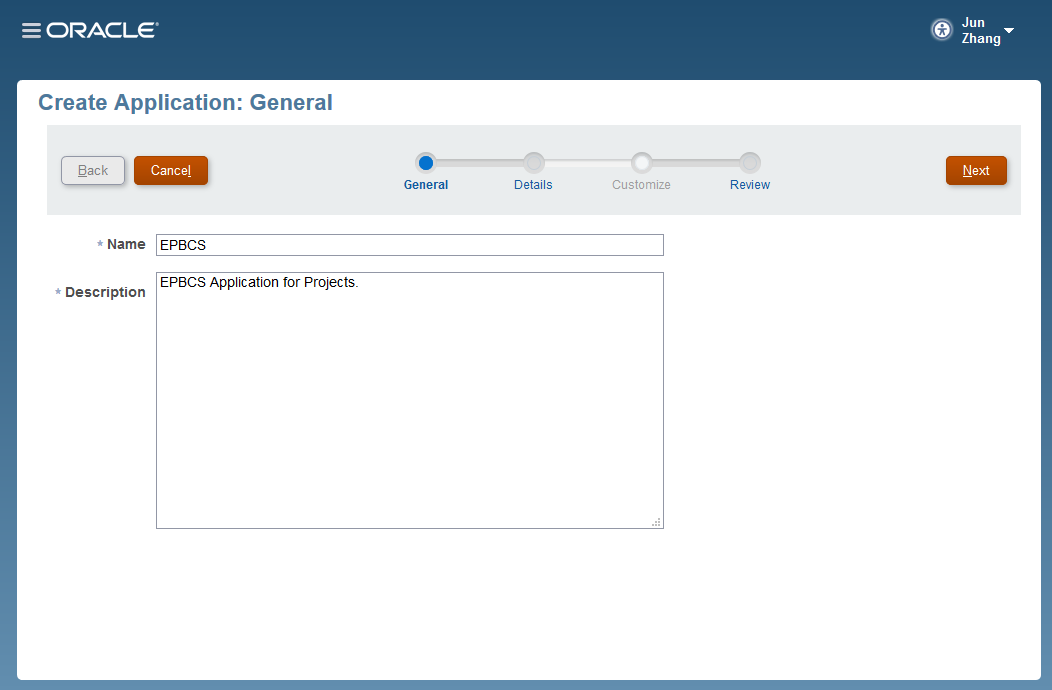
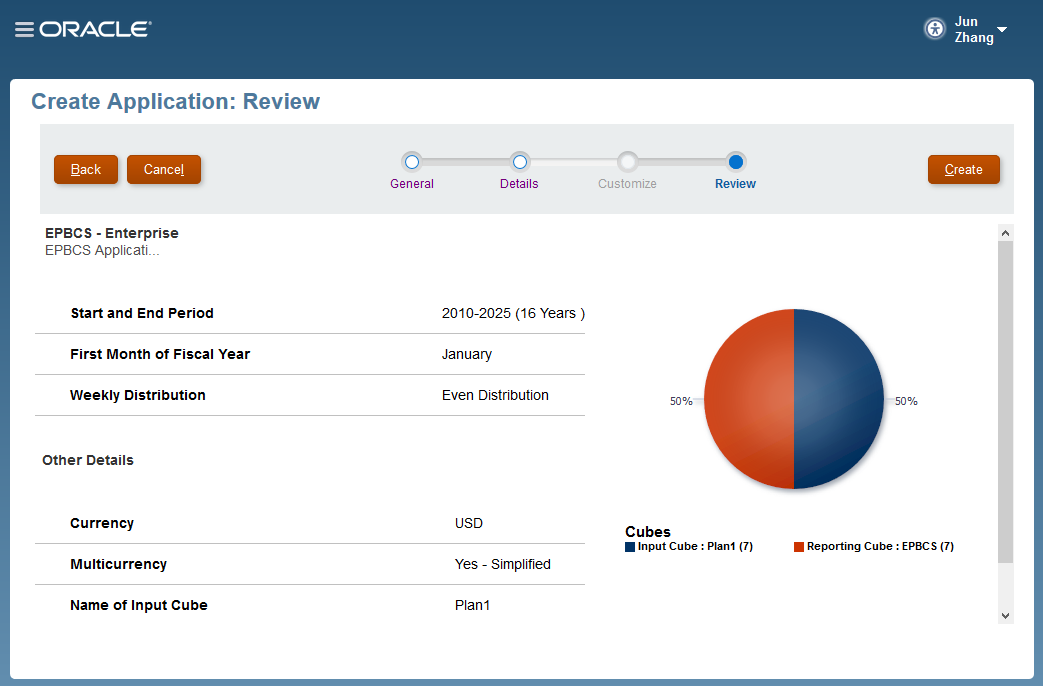
Firstly, let’s create an EPBCS application for Projects.
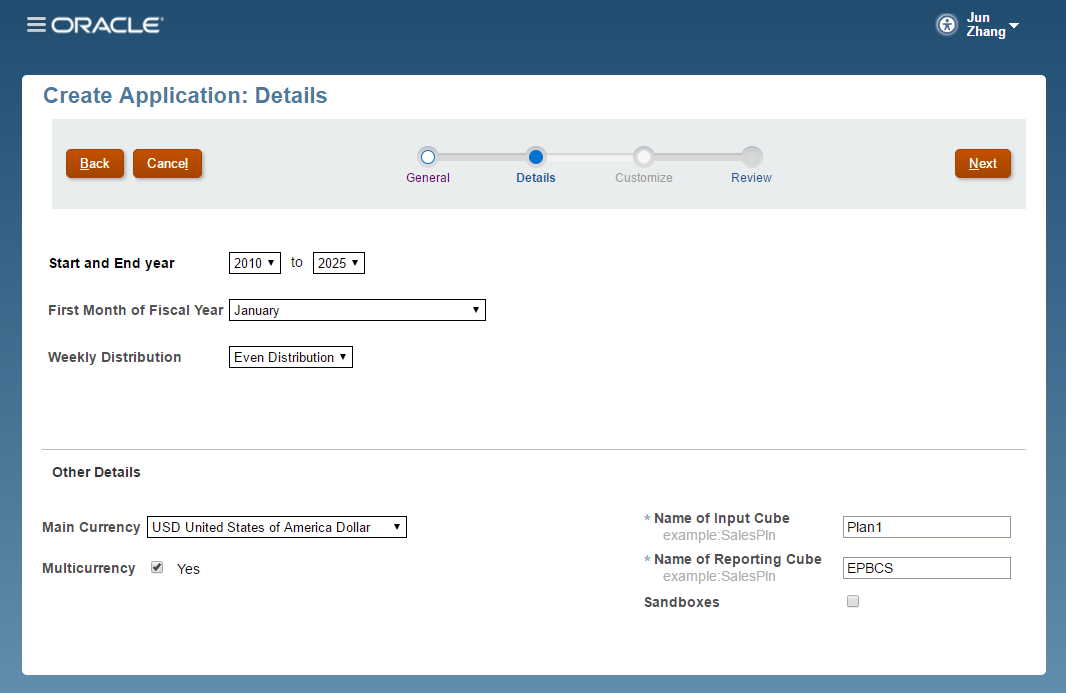
Select Multicurrency for this application.
After creating the application, we are going to select Application -> Configure to configure the Projects framework.

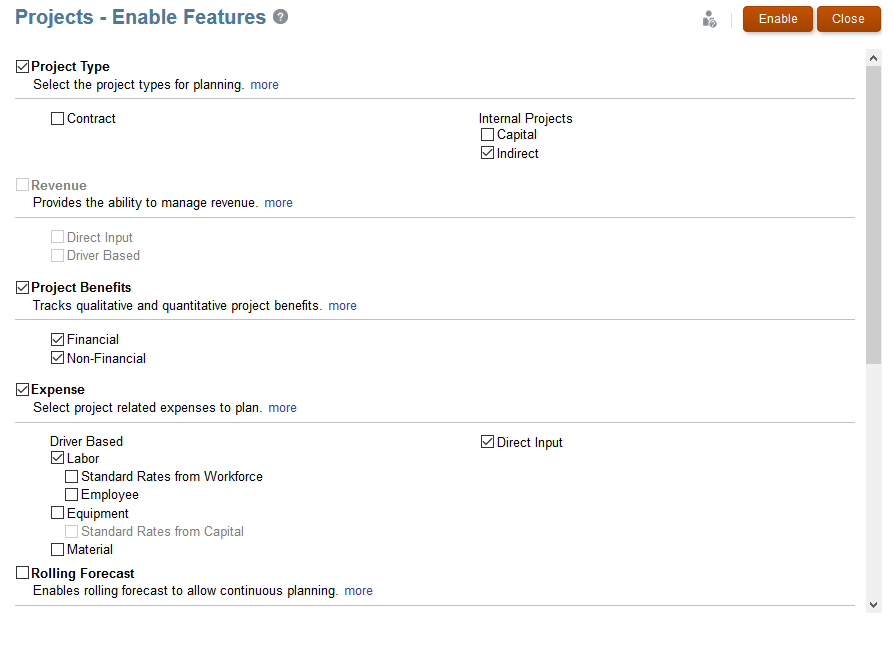
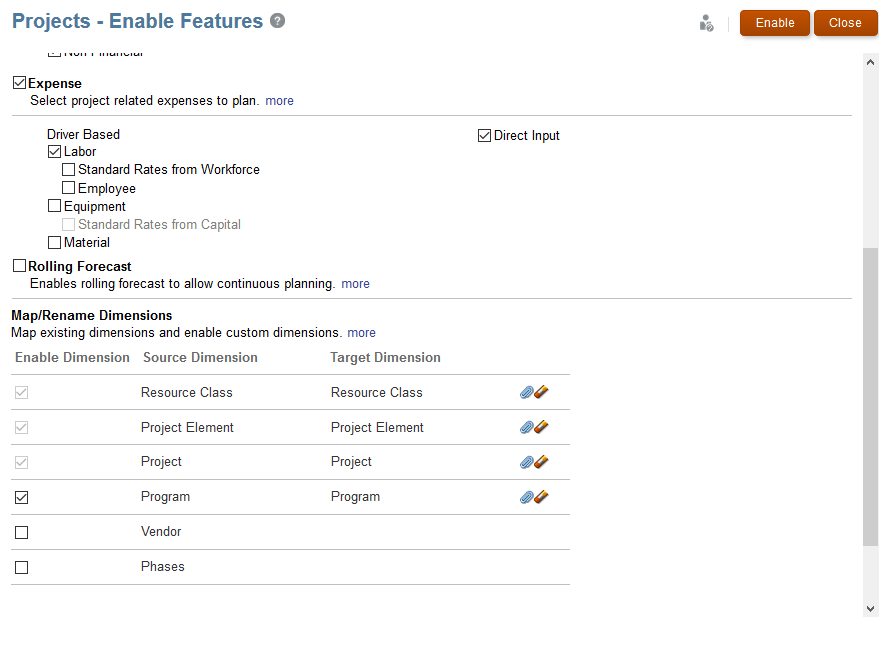
Click Enable Feature, then a new window will pop up, which allows us to select the detail features that we’d like to configure. In this case, I will select the following selections. At this point, we are not doing labor coming in from workforce, but we could enable it if we want to.
Then click Enable. After a few minutes, we will see a new window pop up, saying that the functionality that we selected was successfully enabled. To see the new navigation flow for Projects, we can either log off the application and re-login, or just simply reload the Navigation Flow.
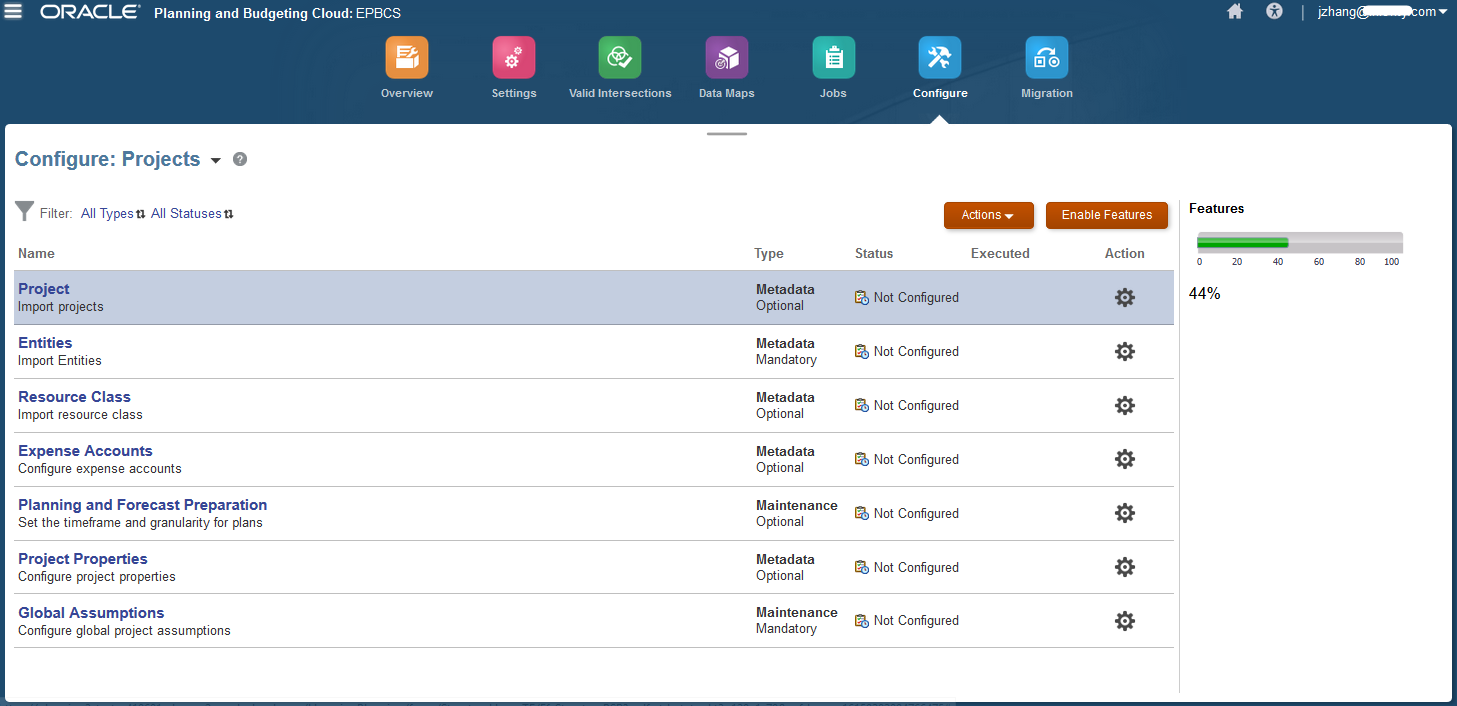
After the Enable step, we will see the following configure screen, where we could go and do metadata and data load, and other configuration functions
The new Projects cluster contains 3 cards: Project Summary, Expense, and Analysis.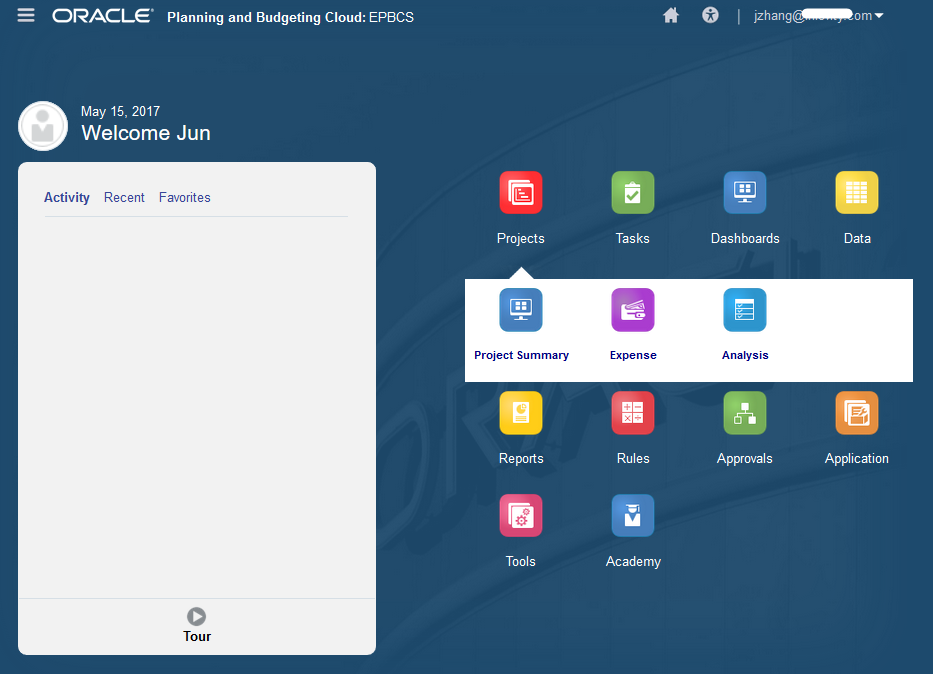
Let’s check the Navigator first.

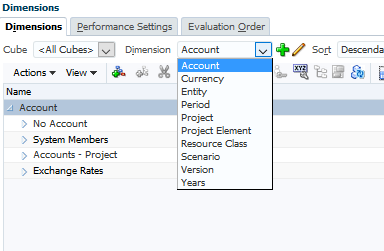
Then take a look at the dimensions. we see there is a new cube, OEP_PFP, have been created.
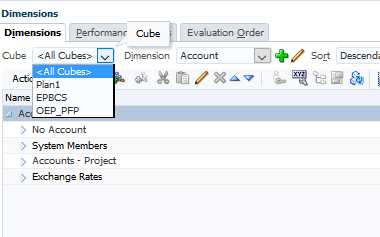
Take a look at the dimensions.
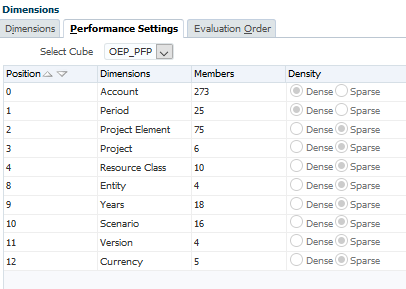
Performance Settings gives us a clear picture on how many dimensions and members have been created in the new cubes.
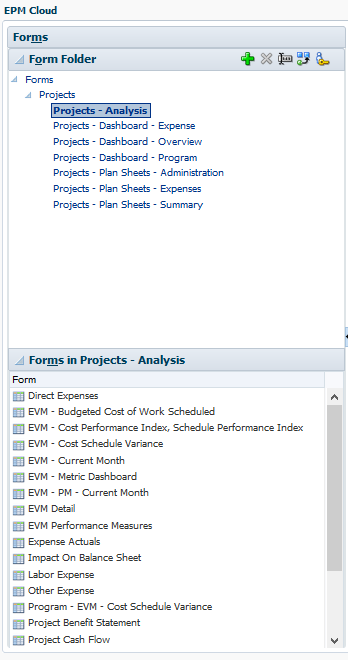
Also, there are many webforms that have been created after we enabled the Projects framework.
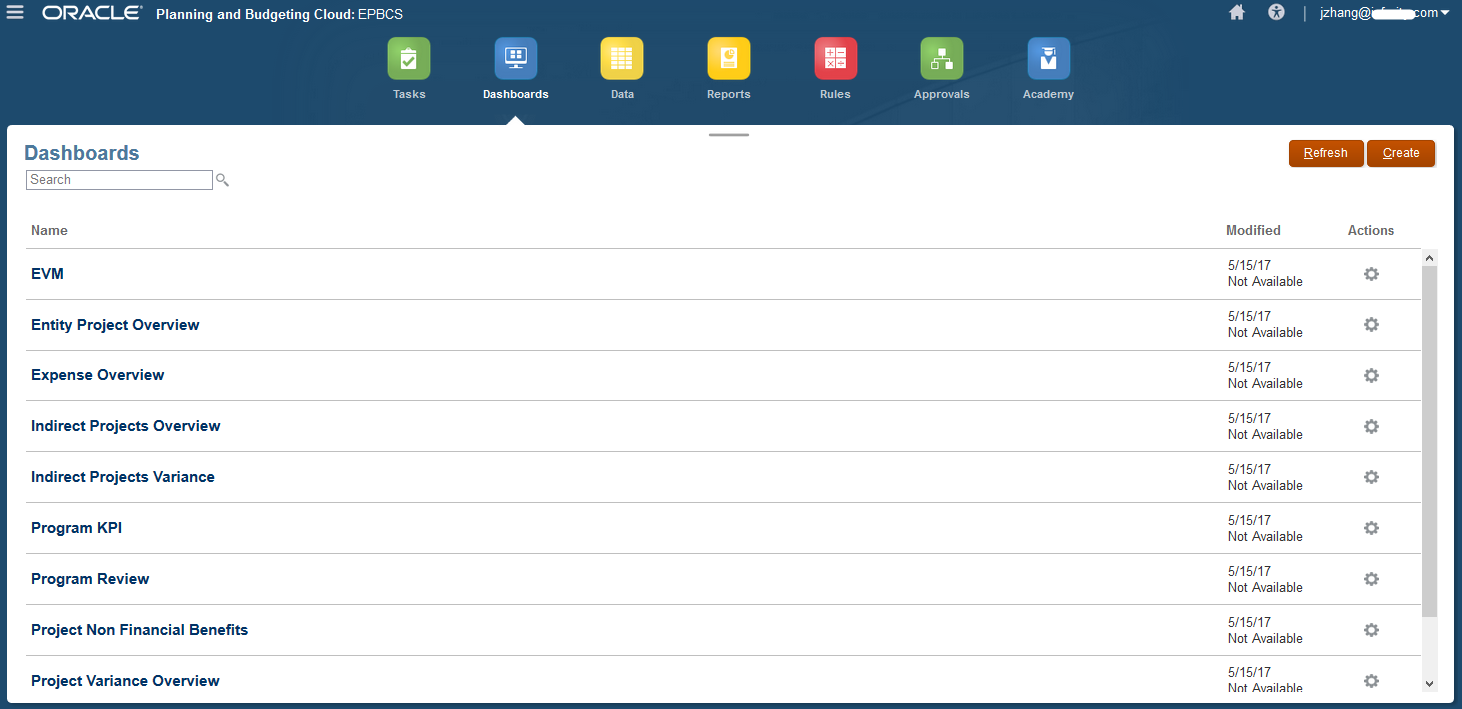
Dashboards are available for future use.
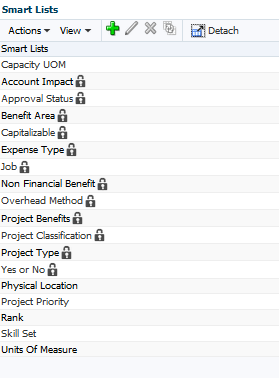
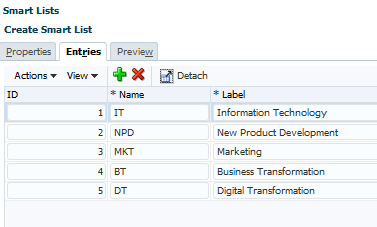
The Smart Lists have been created.
These are the business rules for the OEP_PFP cube.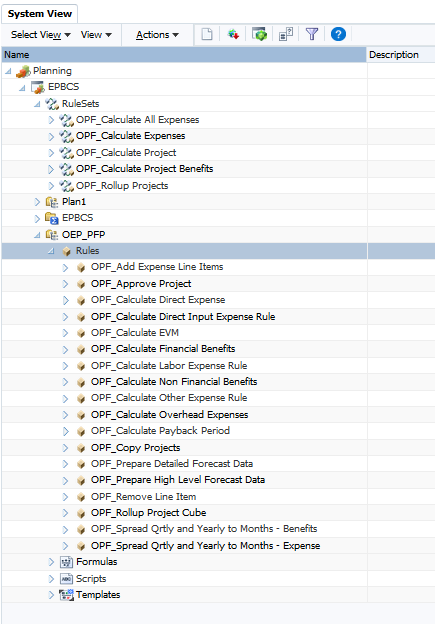
Using Projects
After successfully enabled the Projects framework, let’s see how to use this out of the box framework.
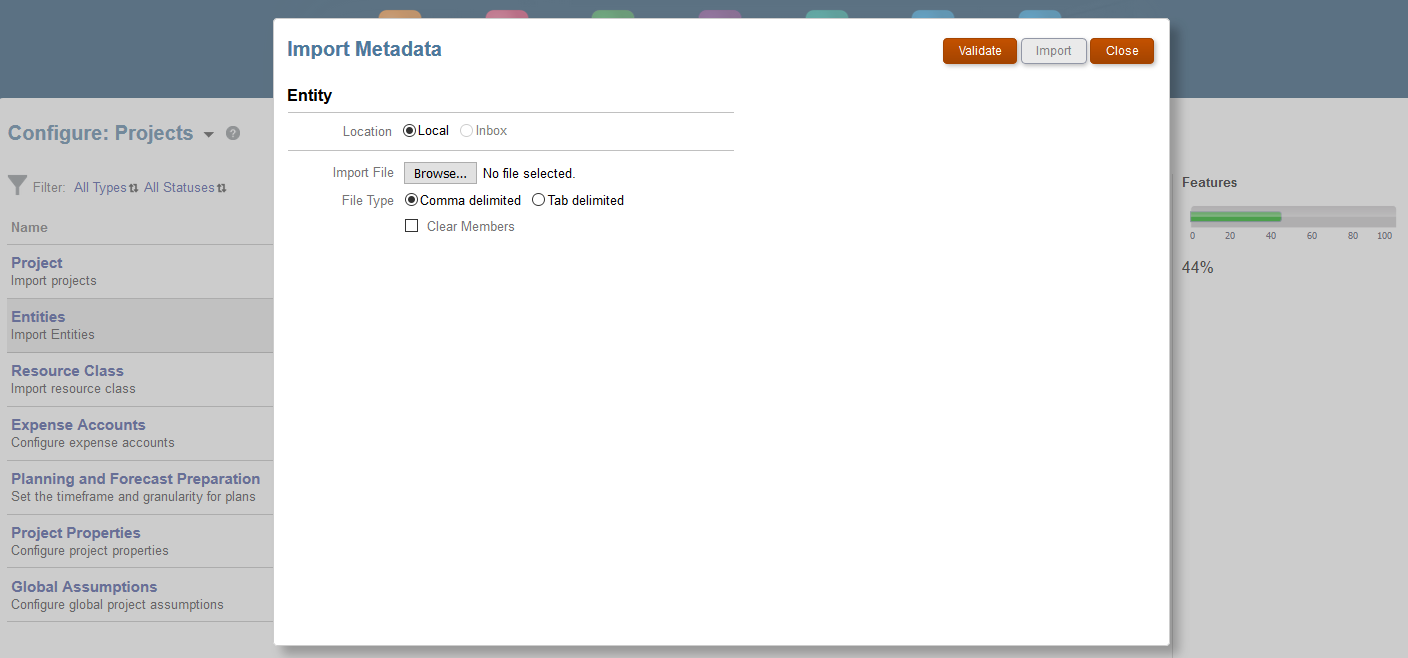
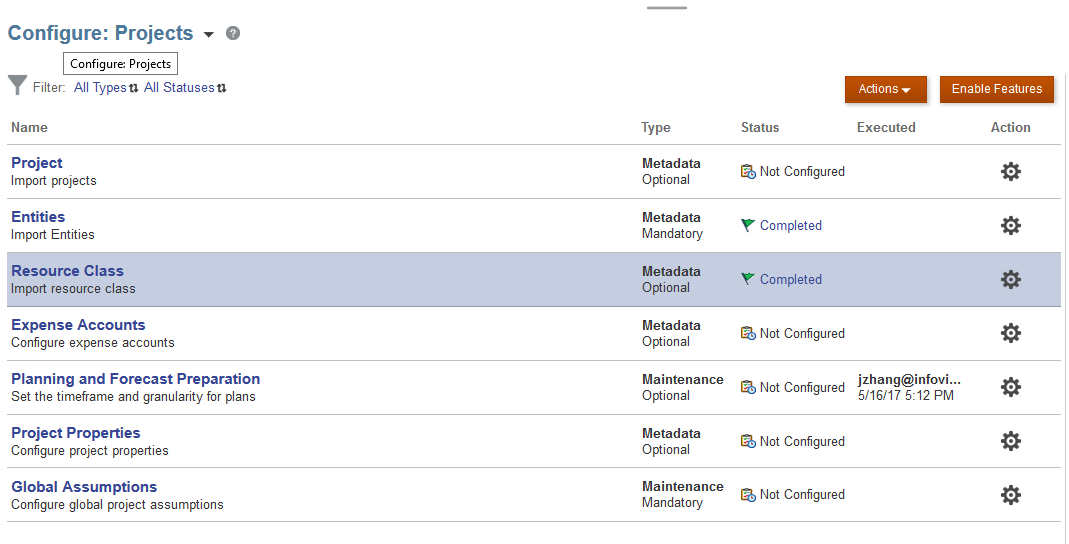
Let’s start with loading the Entities metadata through the configurator.
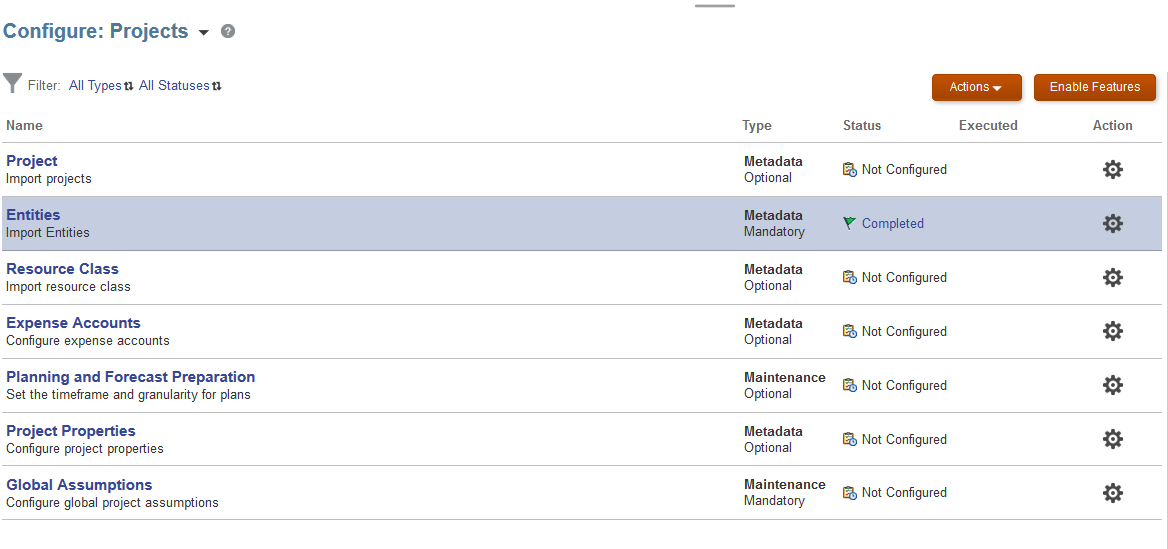
After importing the Entities dimension’s metadata, we see green flags showing that the configure processes have completed.
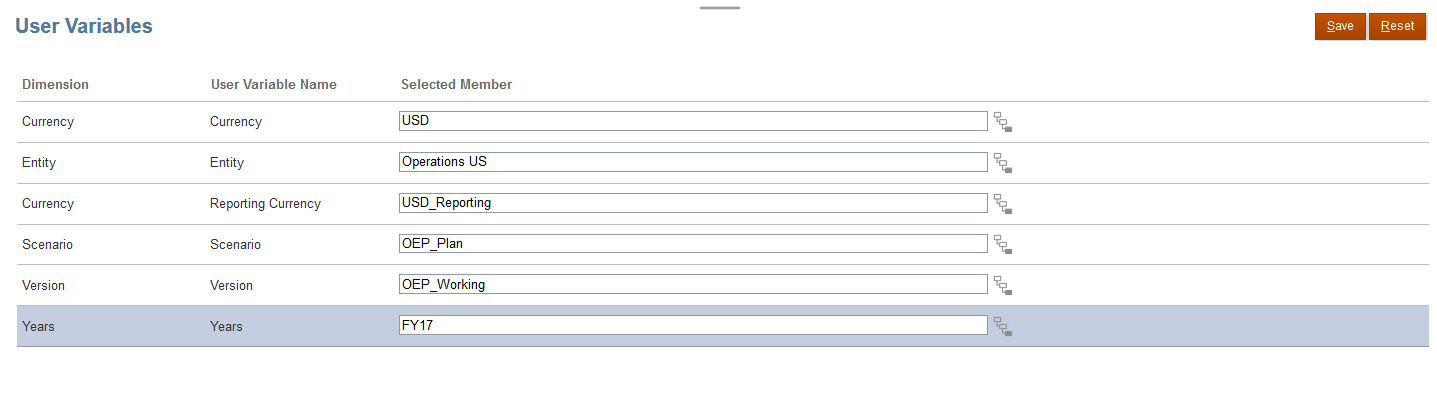
Now set the Variables.
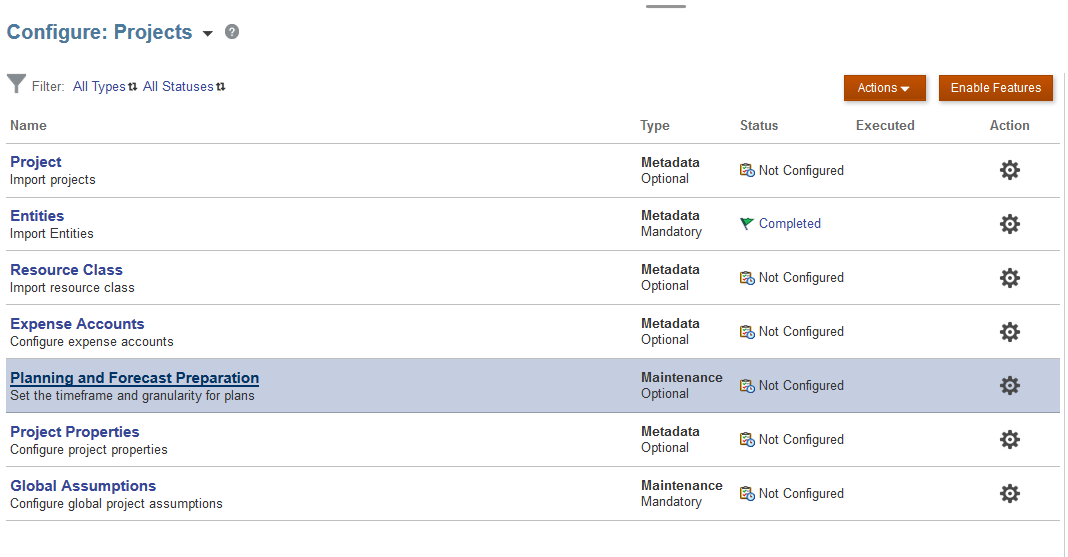
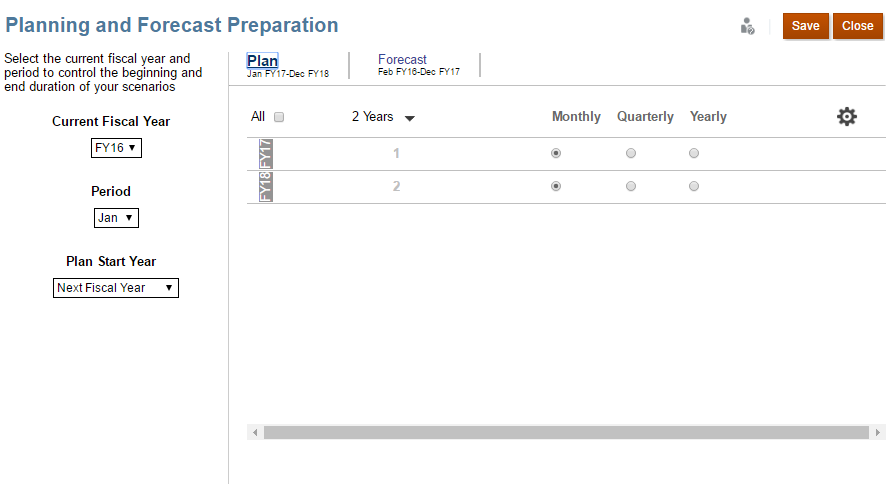
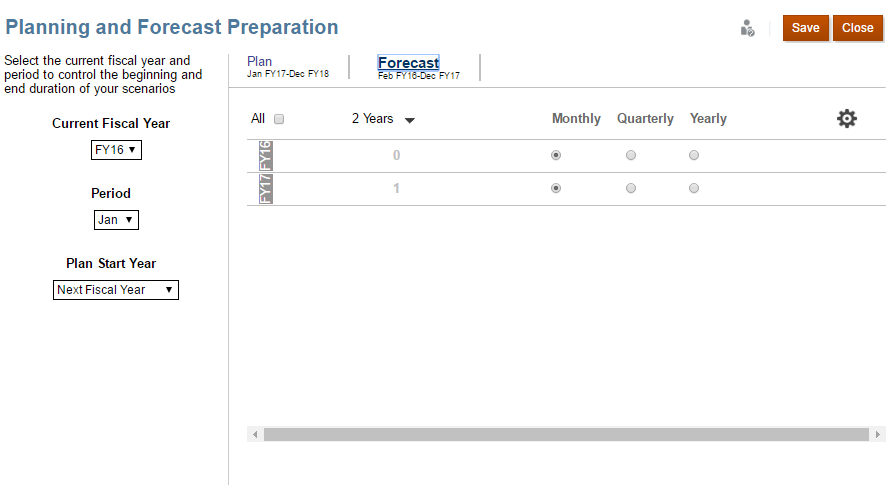
Configure Planning and Forecast Preparation.
Plan:
Forecast:
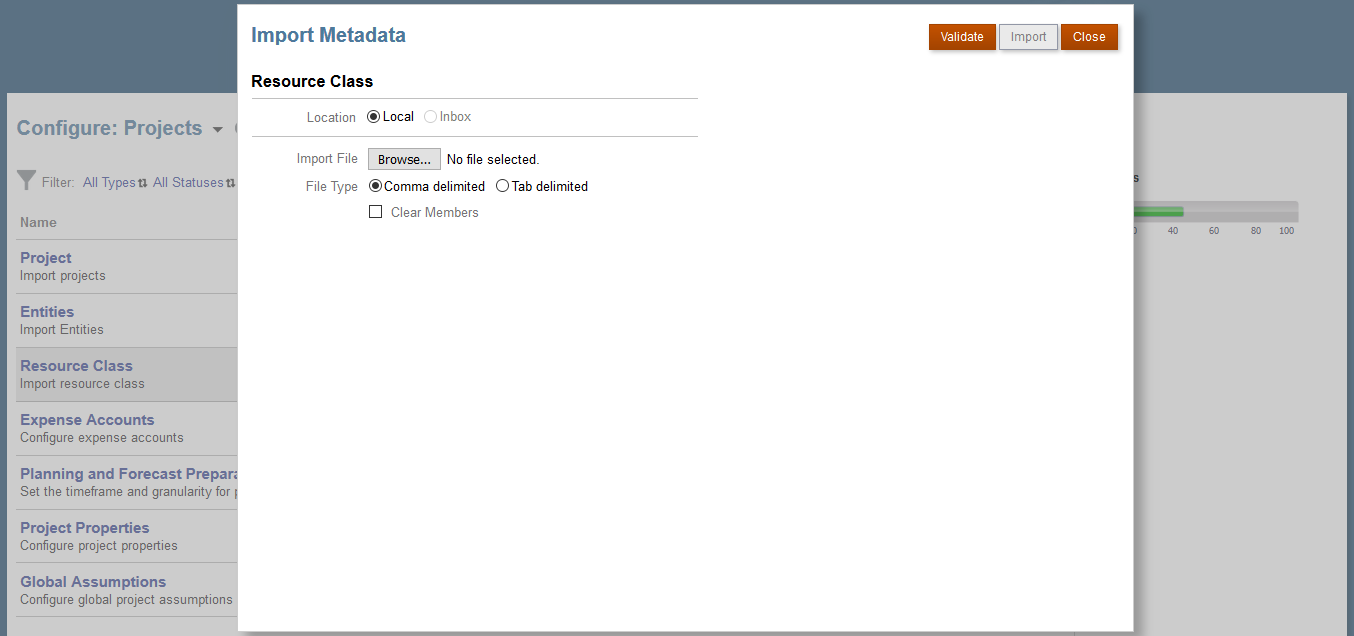
Load the Resource Class metadata through the configurator.
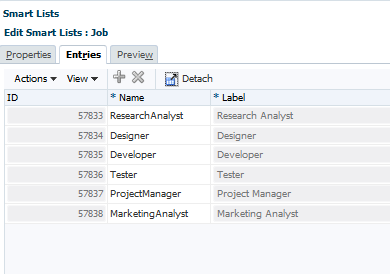
Now, let’s verify the Smart Lists for Job. We will notice the interesting thing is based on the previous action of adding resource class under labor codes, it also updates the Smart List of the type member for Job. This will be used in the forms for the users to select the Smart Lists for jobs.
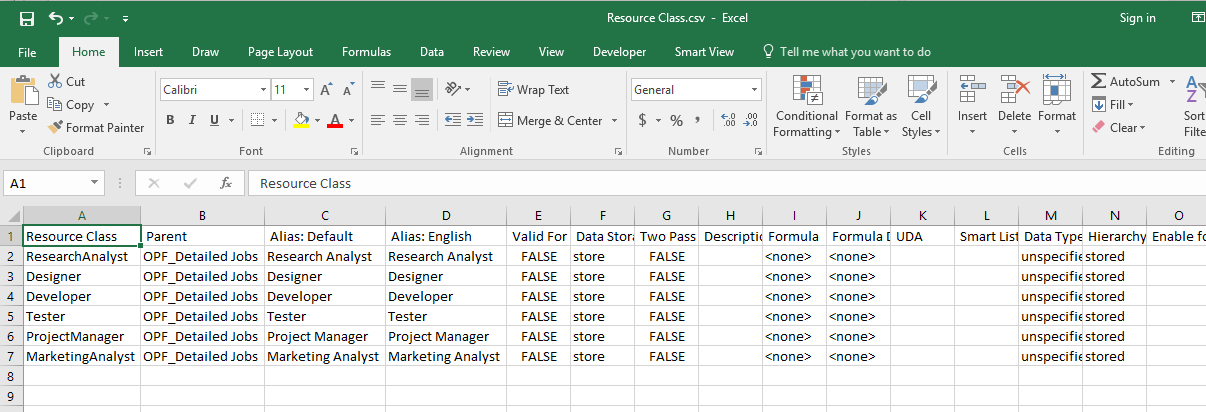
This is the Resource Class metadata file.
This is the Smart Lists for Job.
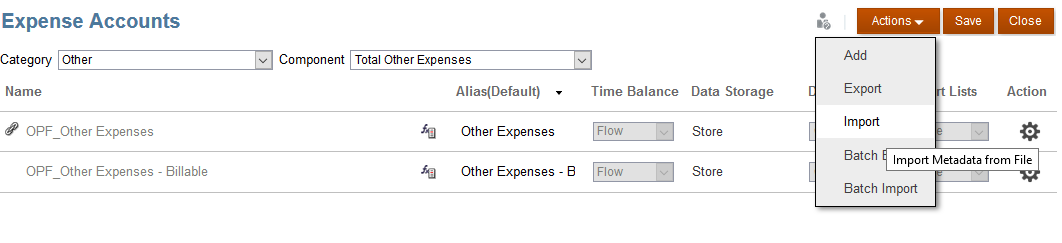
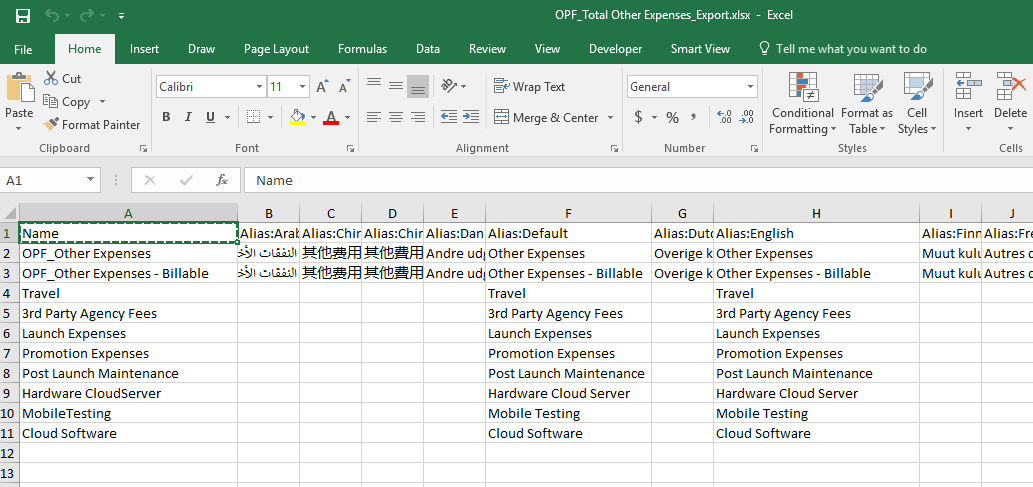
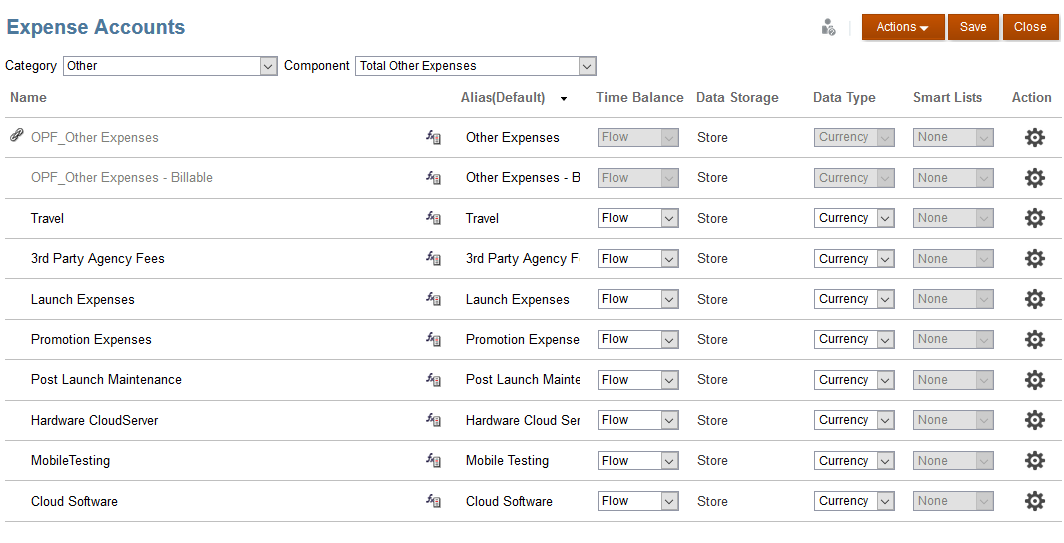
Import Expense Accounts.
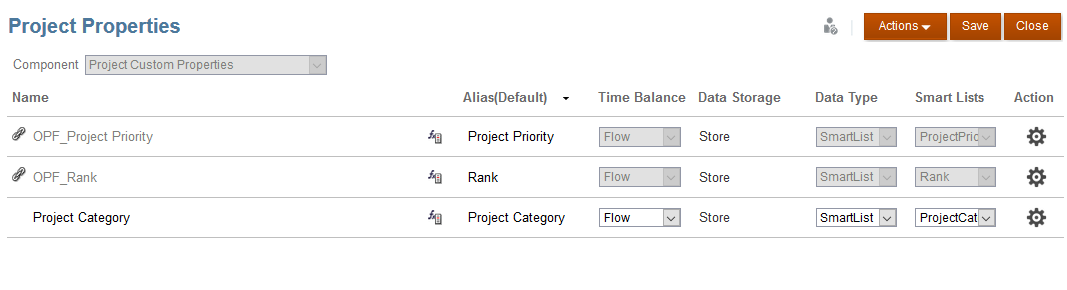
In addition, we want to add some Project Properties that does not exist in the out of box content that would be required for the customer. We will create a Smart List for Project Category.
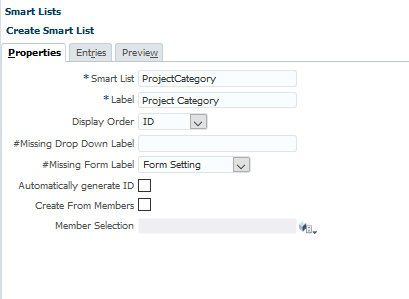
After creating Smart List, In the configuration, go to Project Properties, and add from action menu Project Category and link it to the just defined Project category smart list.

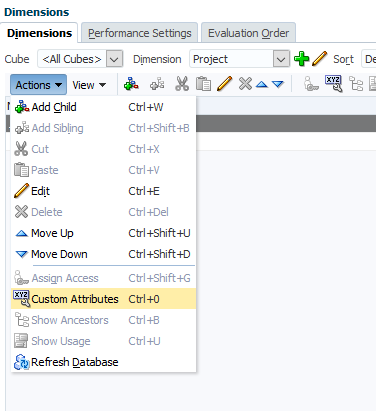
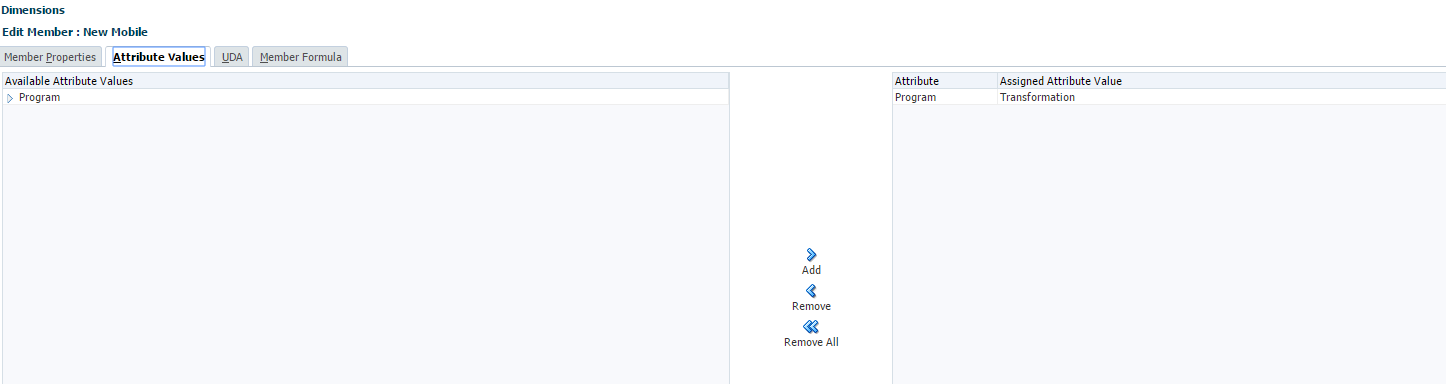
We are going to Create an attribute dimension for Program, and associate projects to different Programs.
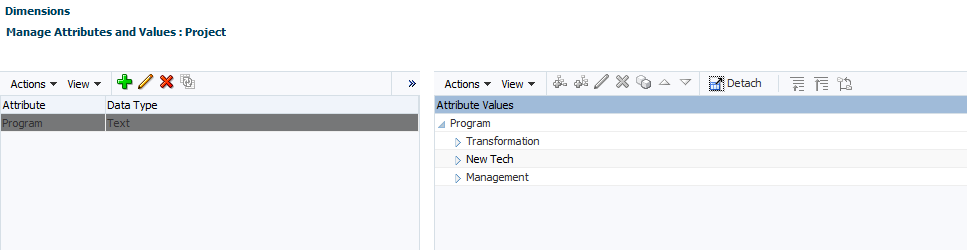
We could assign projects to program once we have added the projects. This will help in reporting for projects falling into specific programs.
We should see how a new indirect project can be added by the end user. The user would enter a New Mobile project that is part of the Digital Transformation program. This project will help bring out new website and mobile of the company, and potentially result in new revenue and savings of call center as some of the servicing would move into the digital channels.

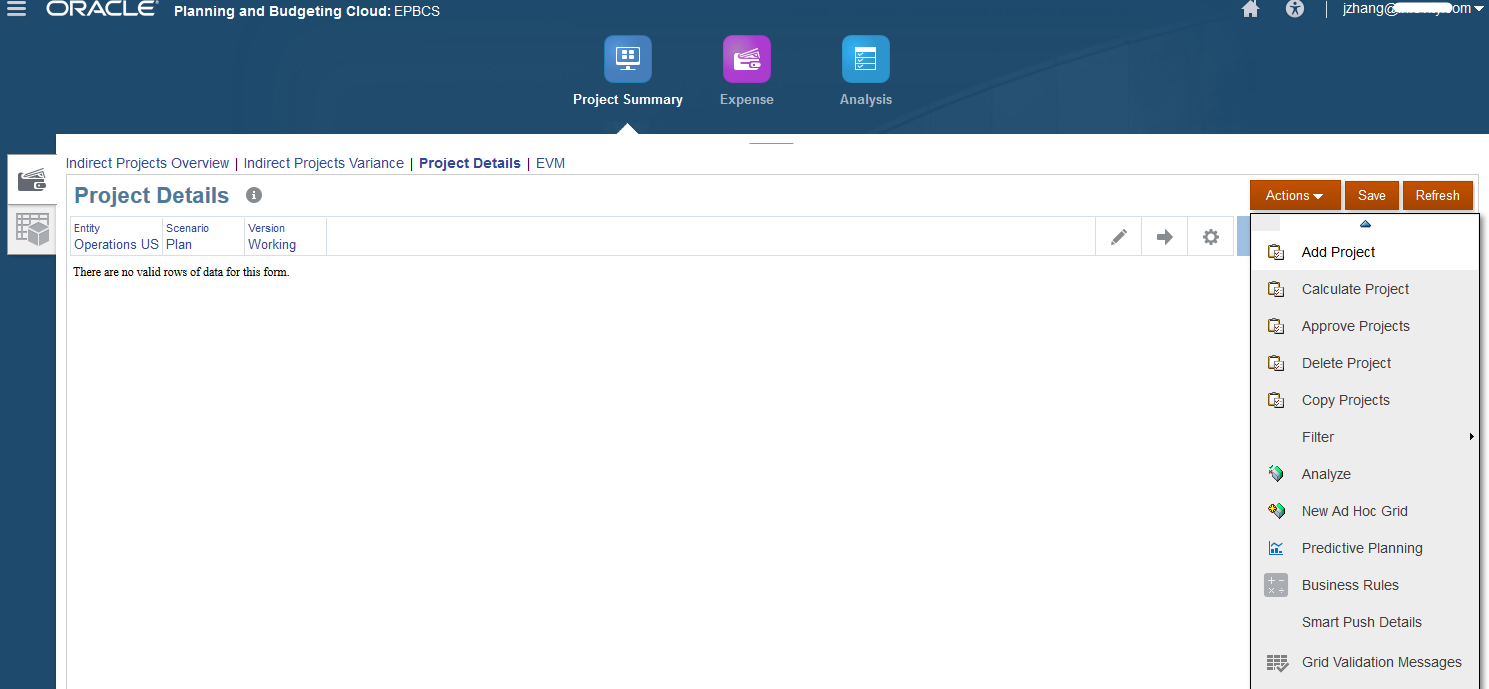
Add a new project.
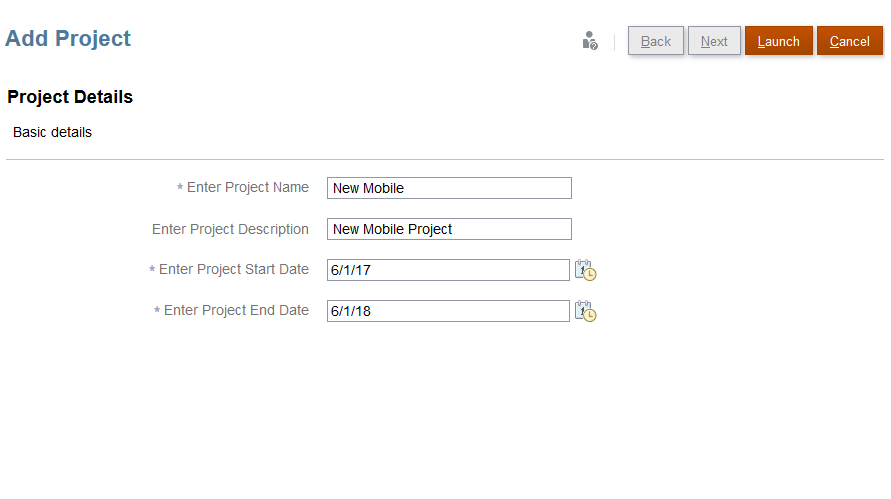
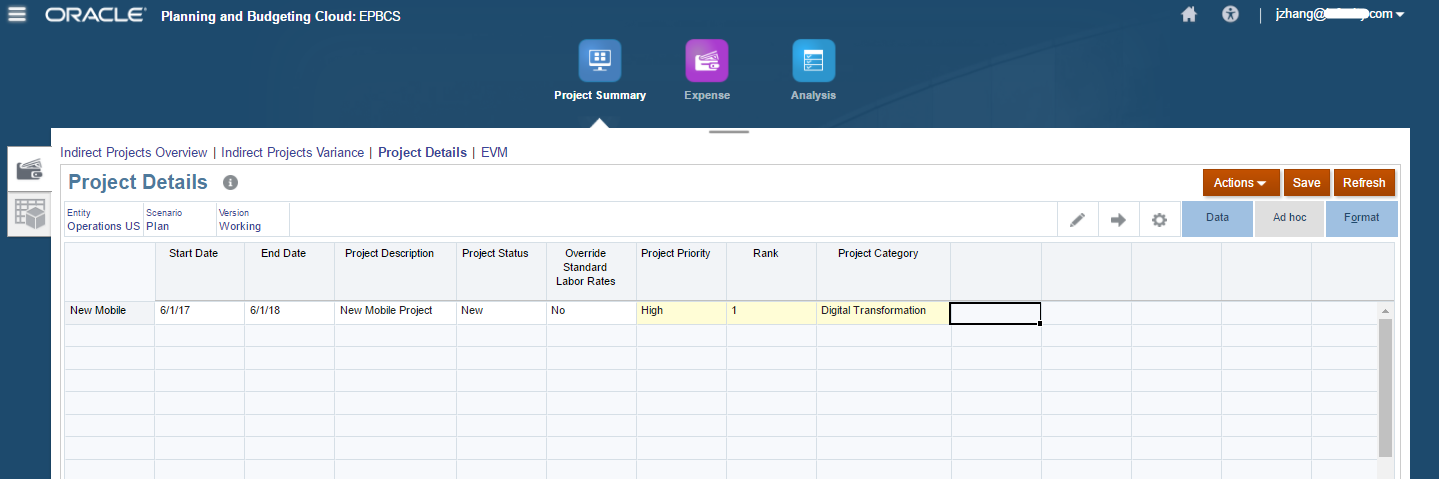
Then enter sample data to this New Mobile project.
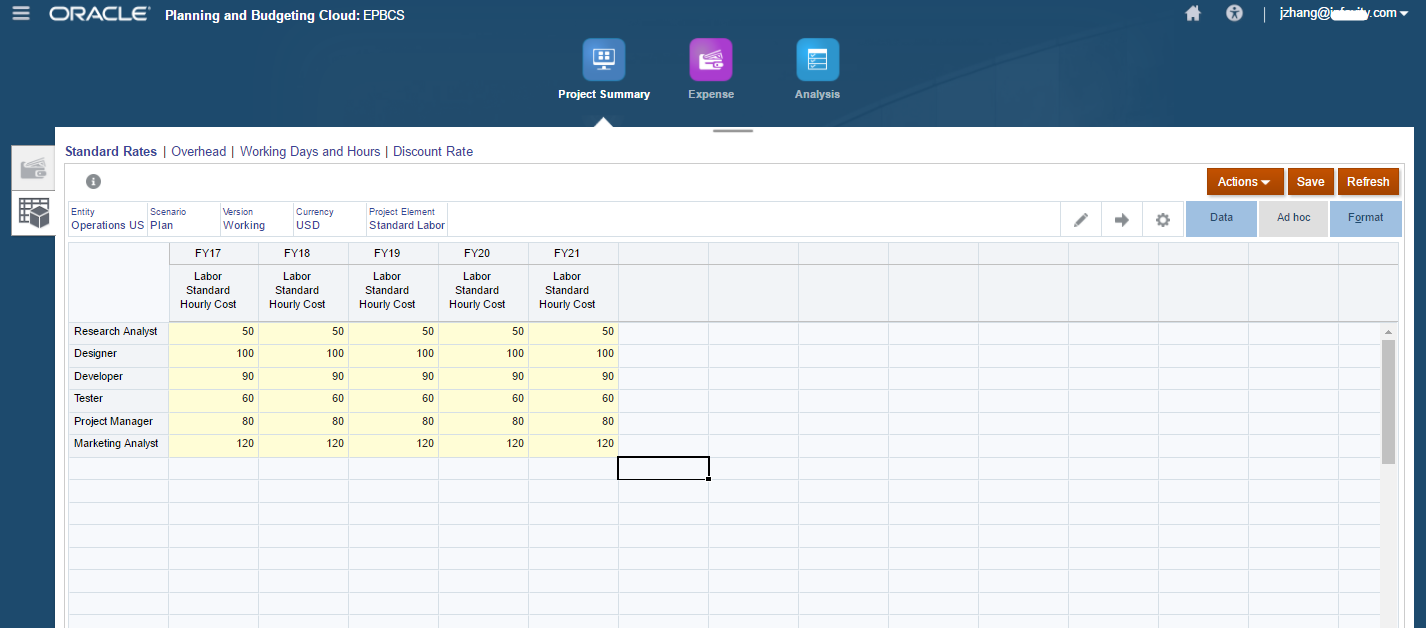
Enter sample data to Standard Rates.
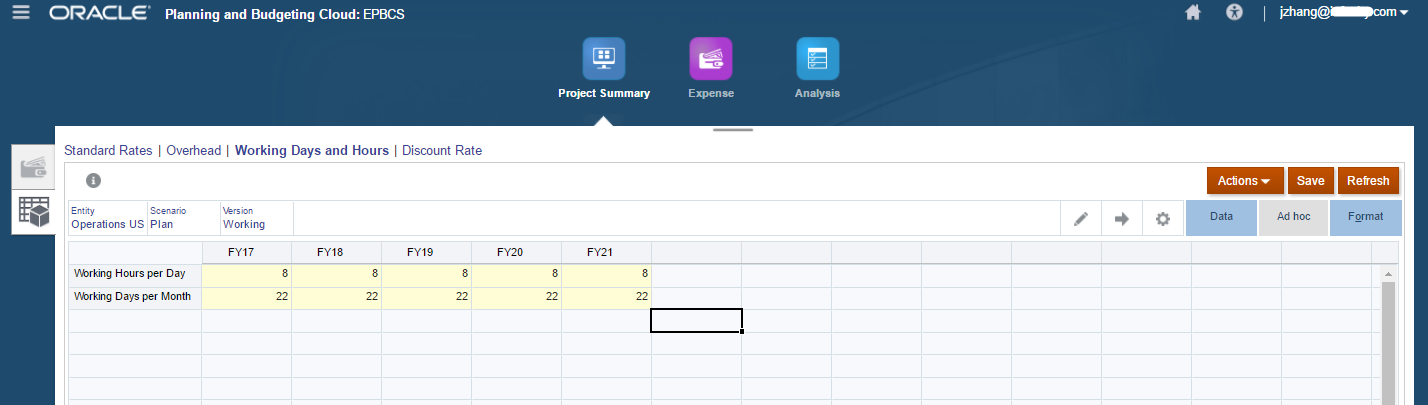
Enter sample data to Working Days and Hours.
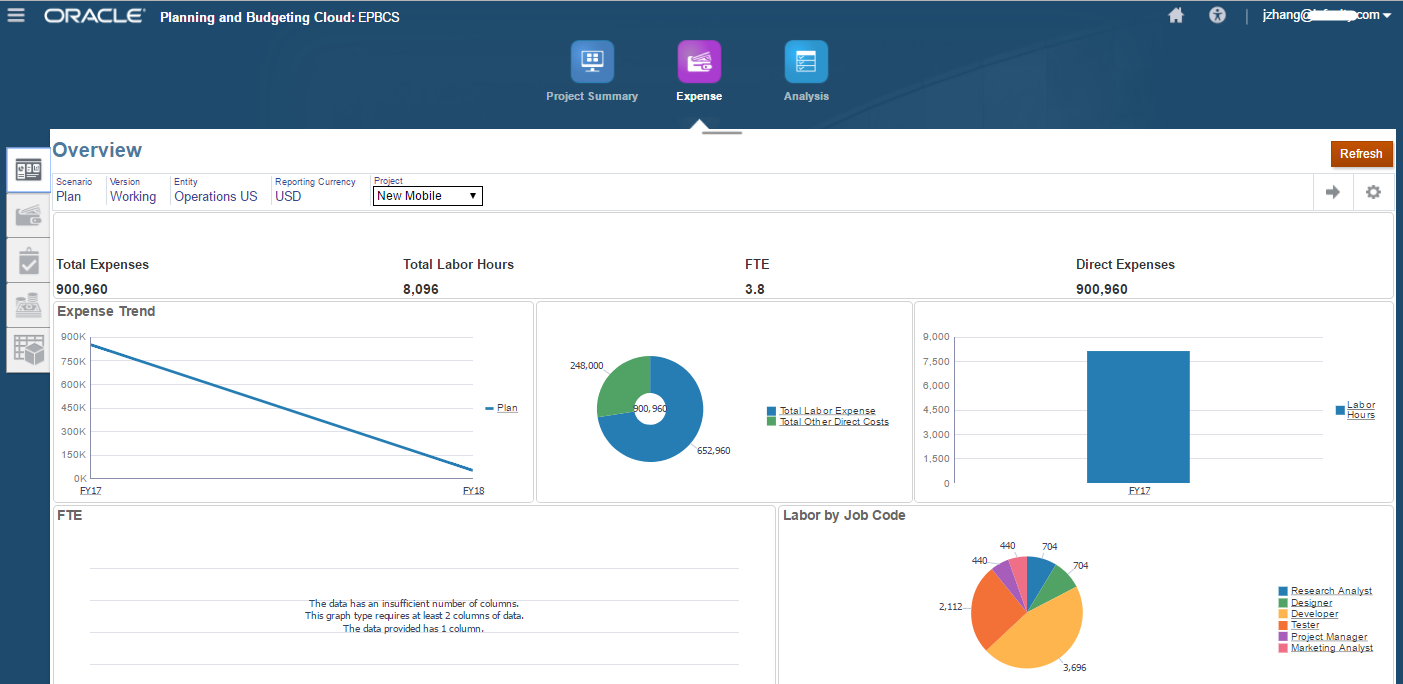
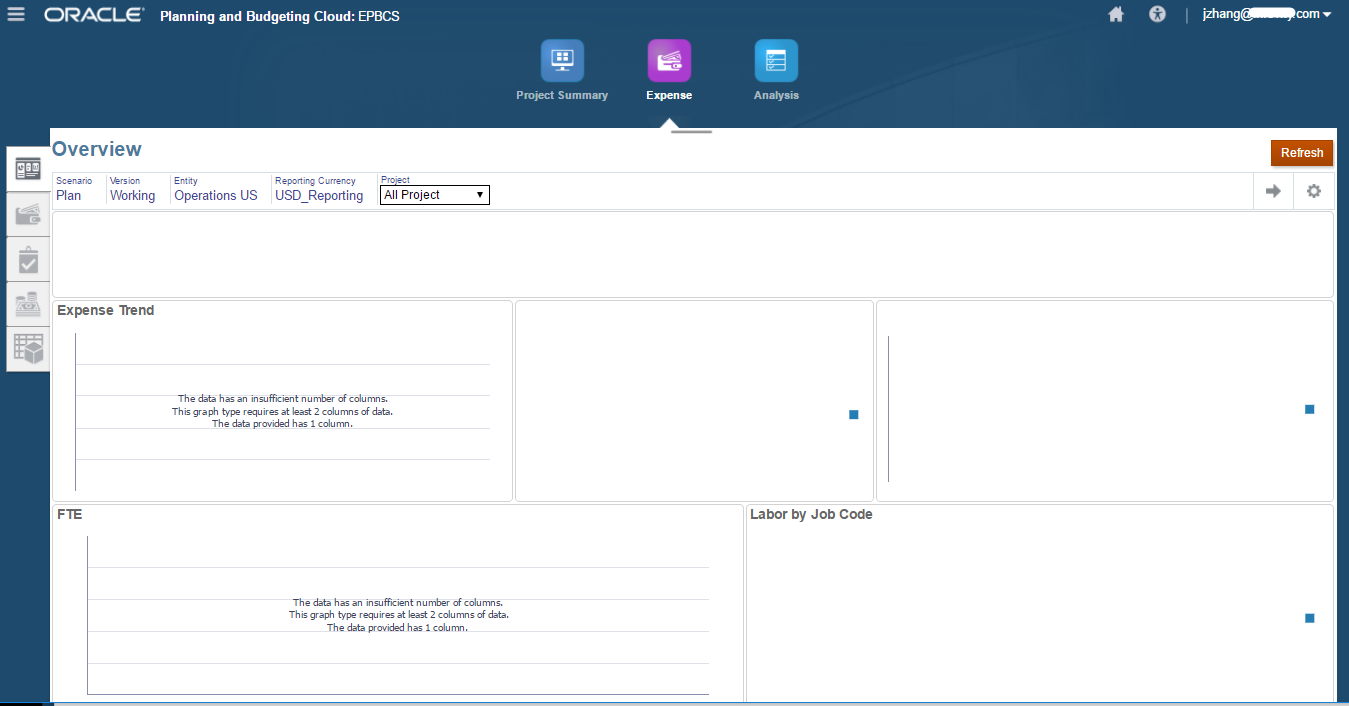
The next step we will see how to plan for project expenses. For labor, we could take a driver based planning approach wherein based on labor assignments, the costs are calculated. For other expenses, the direct input is more convenient. User can review the overall costs in the dashboard as well as the details in the overview form at any time.
Driver based for labor
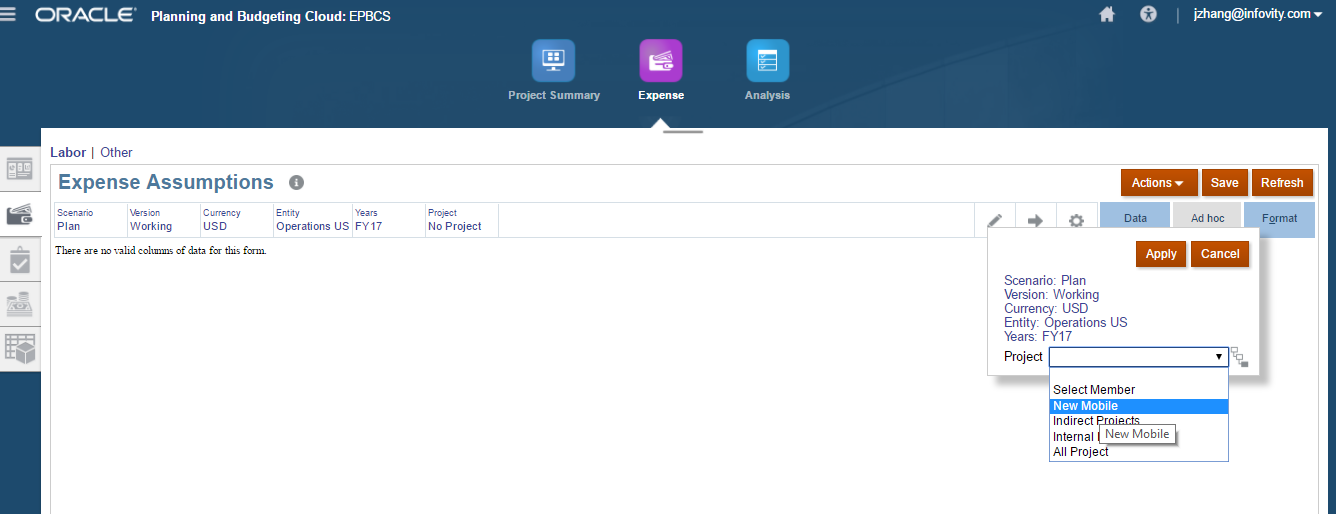
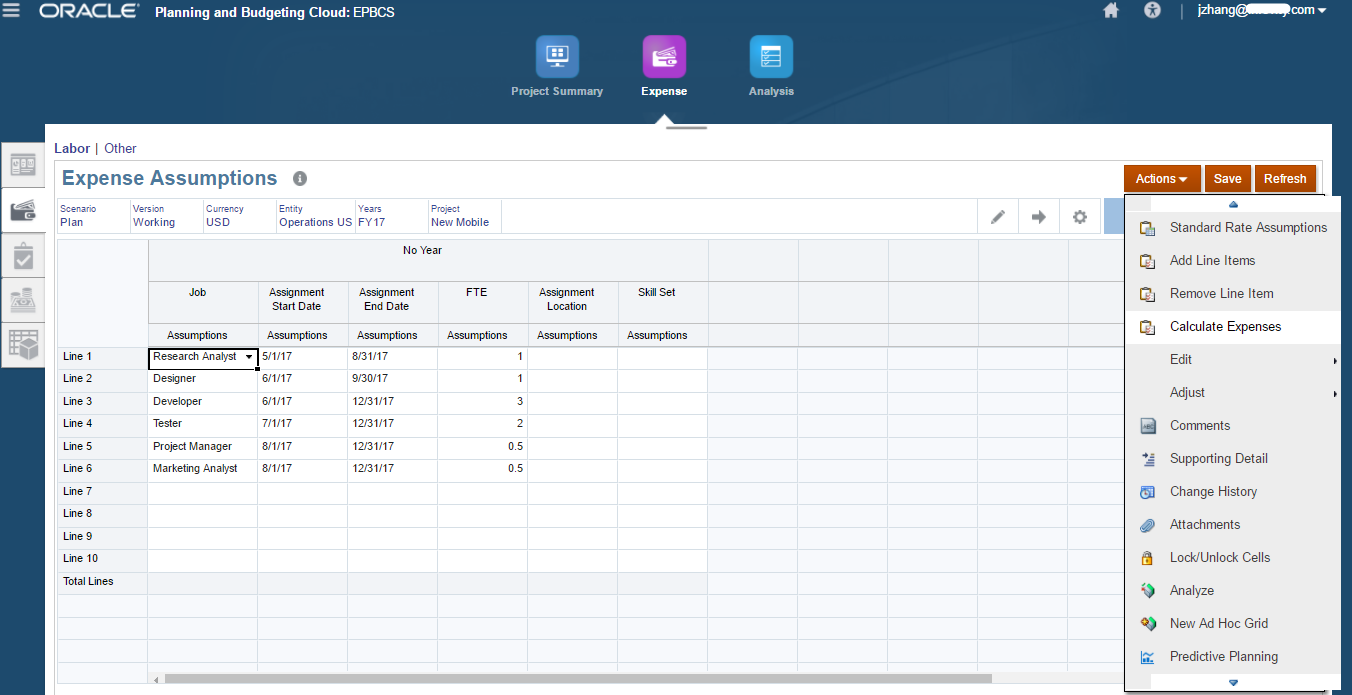
Under the Expenses Card, open the Expense Assumptions webform, select the New Mobile project that we just added.
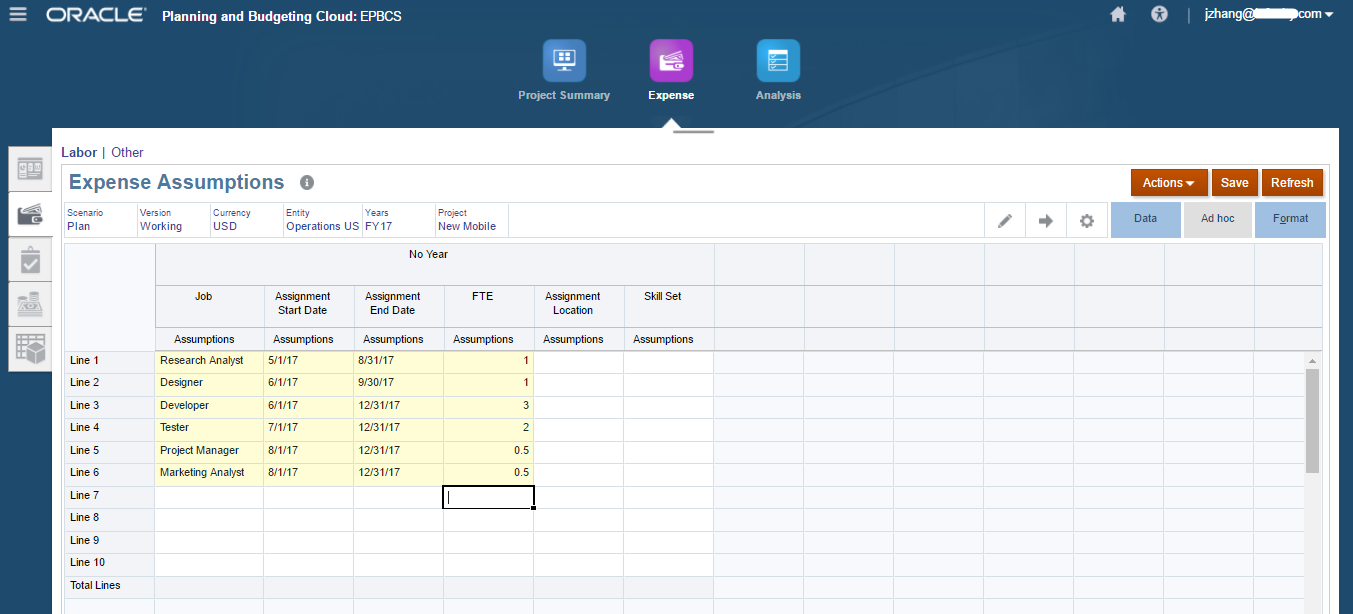
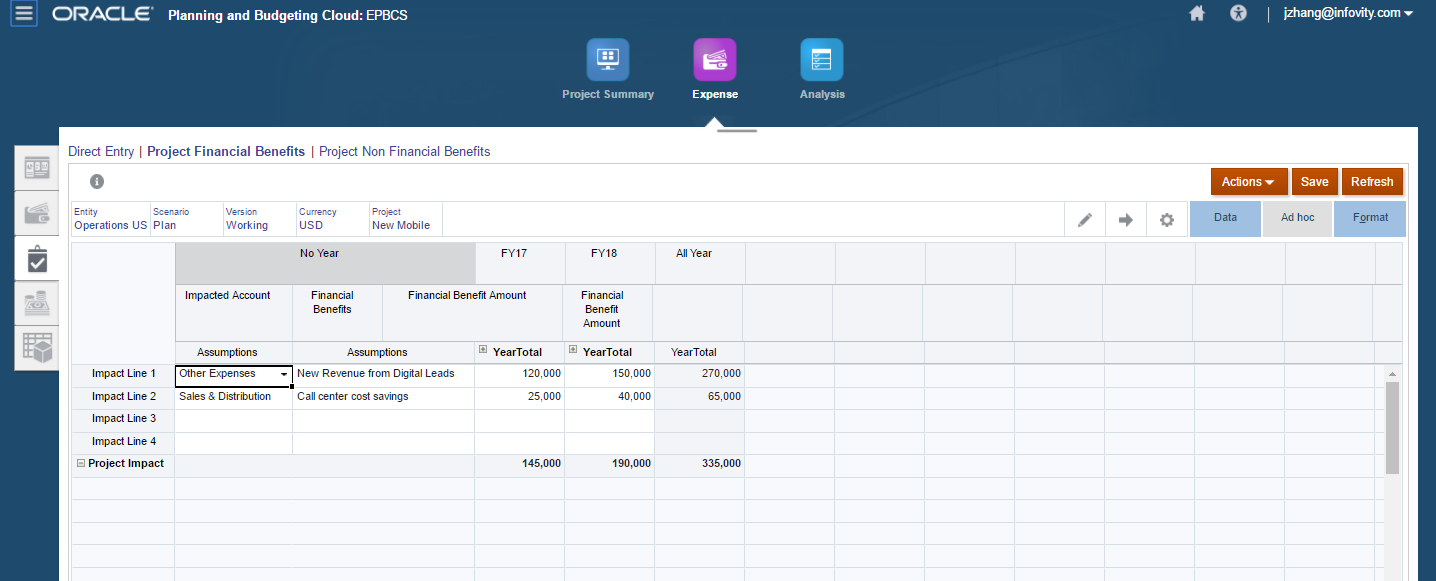
Enter sample data for Expense Assumptions.
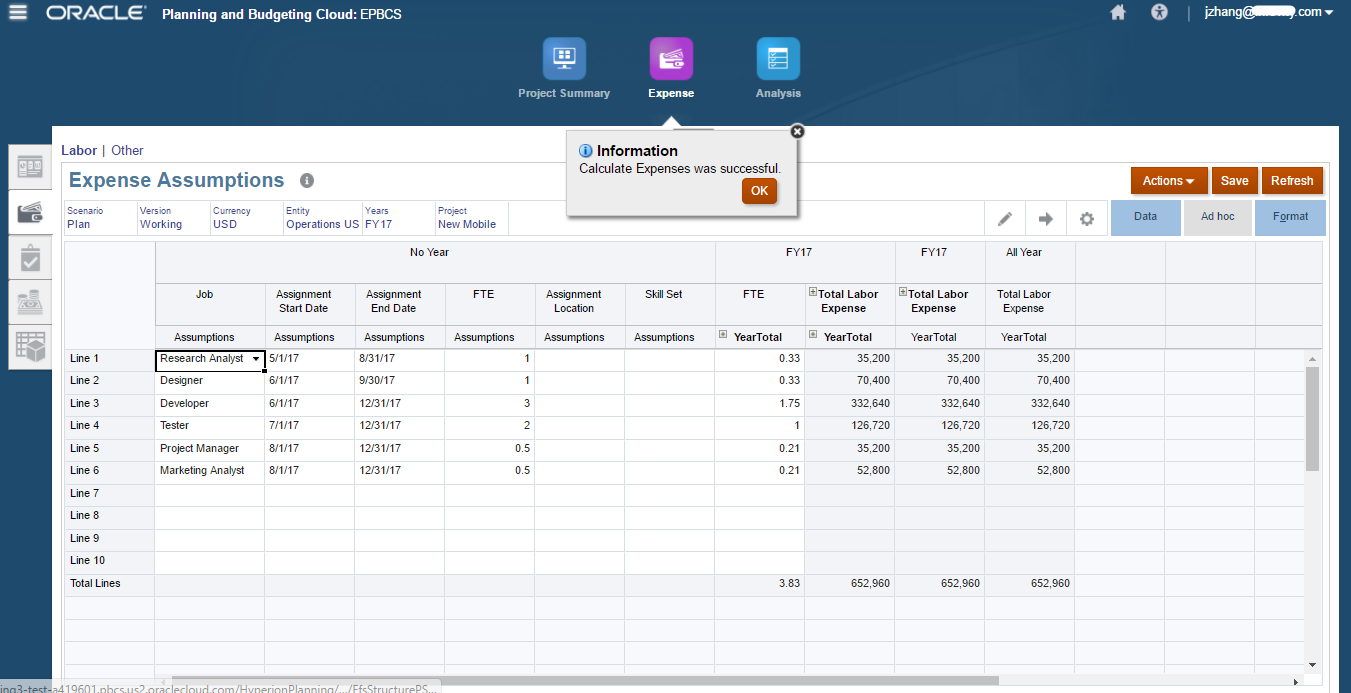
Then click Calculate Expenses.
After calculation, we are able to see the expense derived based on the set assignments. Since the project had override labor rates, we can also see the labor rate has shown out, which can be modified by the user if they want to override the standard labor rate for the project.
Direct Input for others
Enter sample data for other direct input expenses.
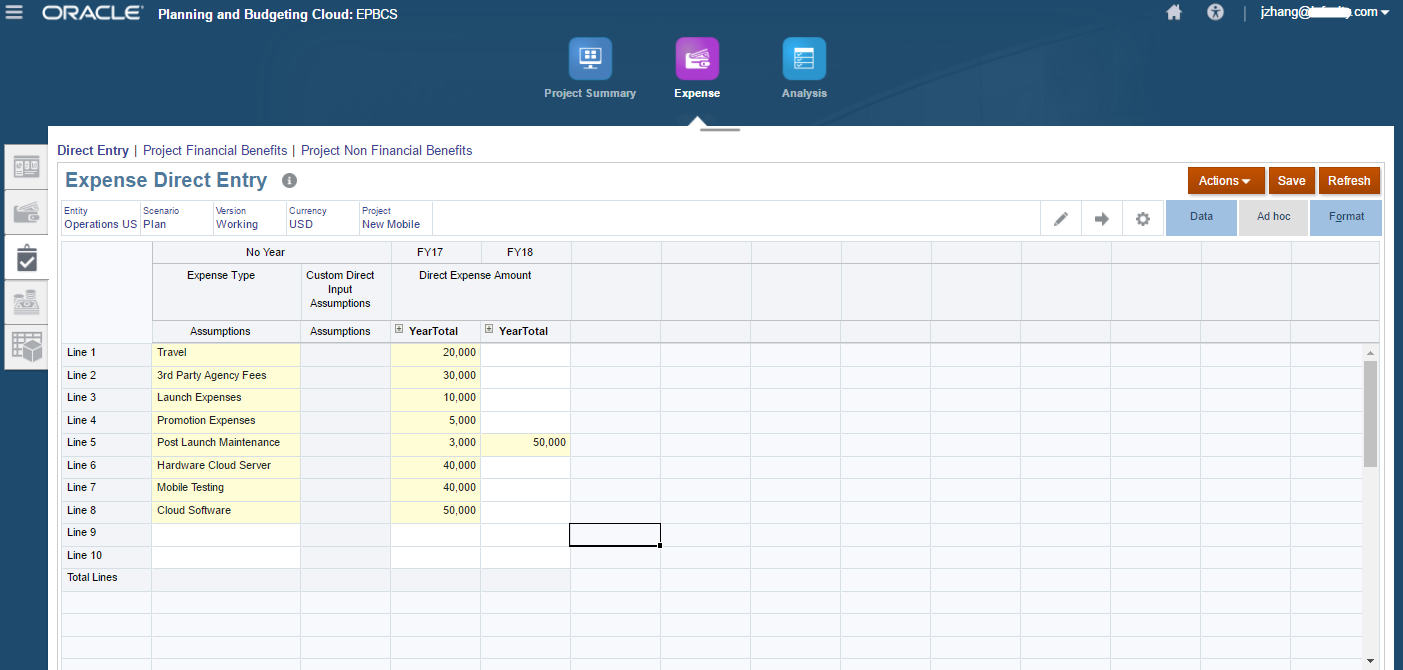
Then click Calculate Expenses.


Then let’s go back to the first tab to review the Overview webform.
Now let’s take a look at the project benefits. Project benefits are captured to quantify the measurable impacts that can be planned for an internal project. The benefits can be specified as financial, non financial quantifiable measures or just qualitative measures. Let’s see how these are captured in the solution against this project.
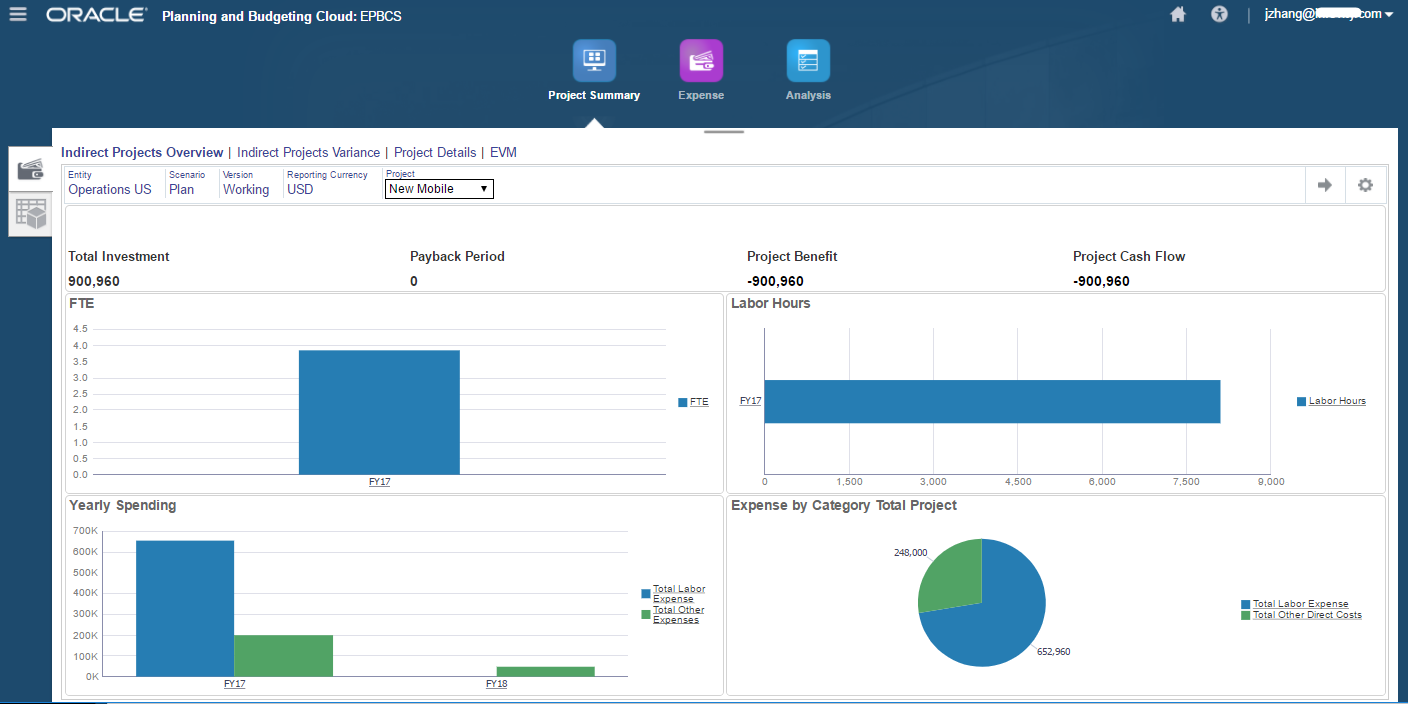
This is the Indirect Projects Overview form before we submit any project benefits.
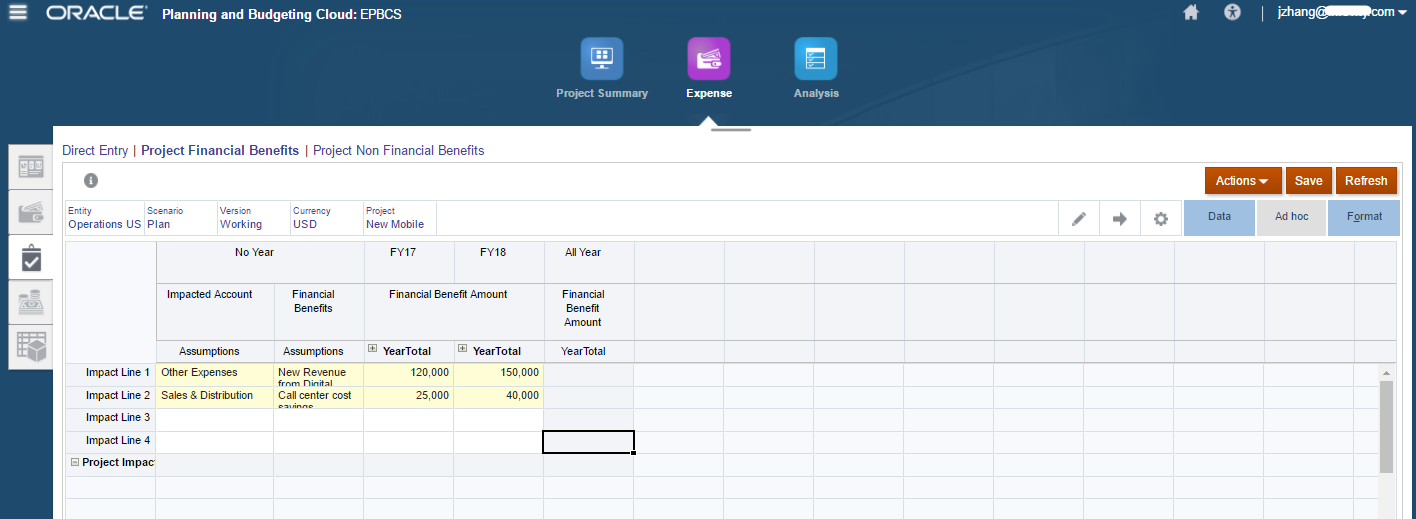
Project Financial Benefits
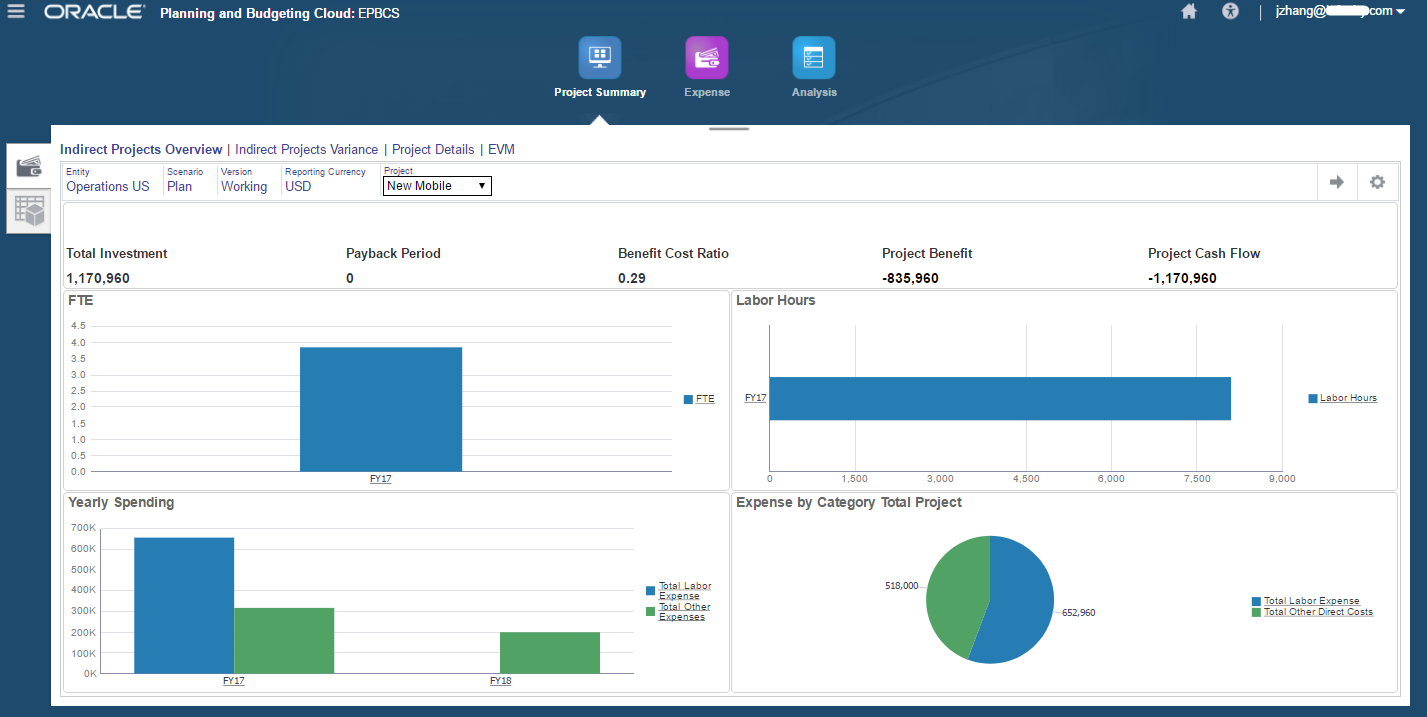
Let’s check the Indirect Projects Overview again.
Project Non Financial Benefits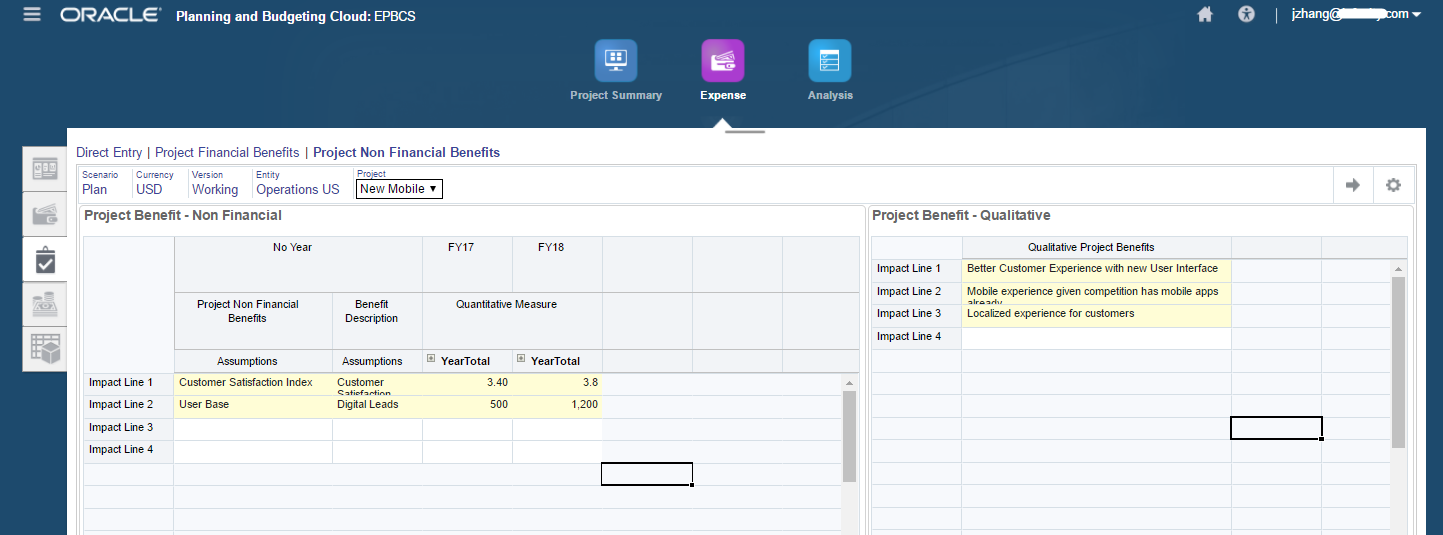
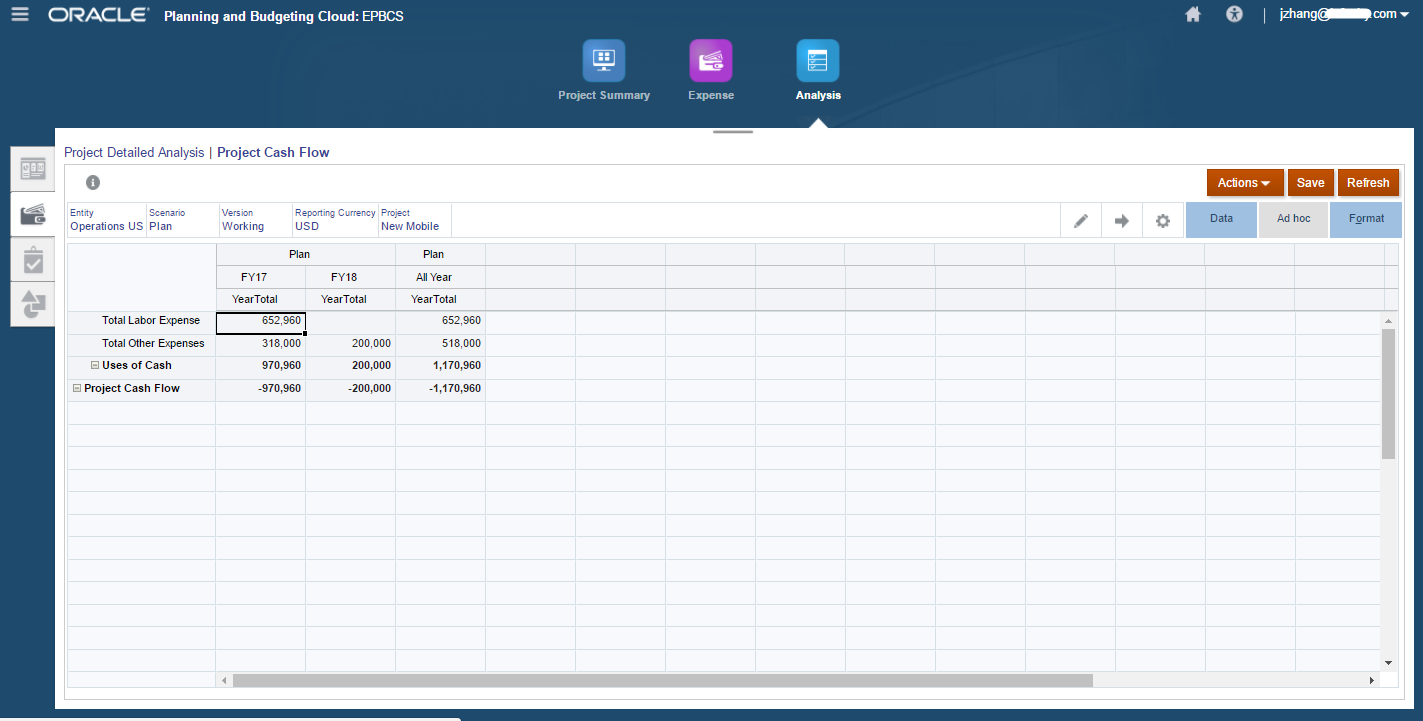
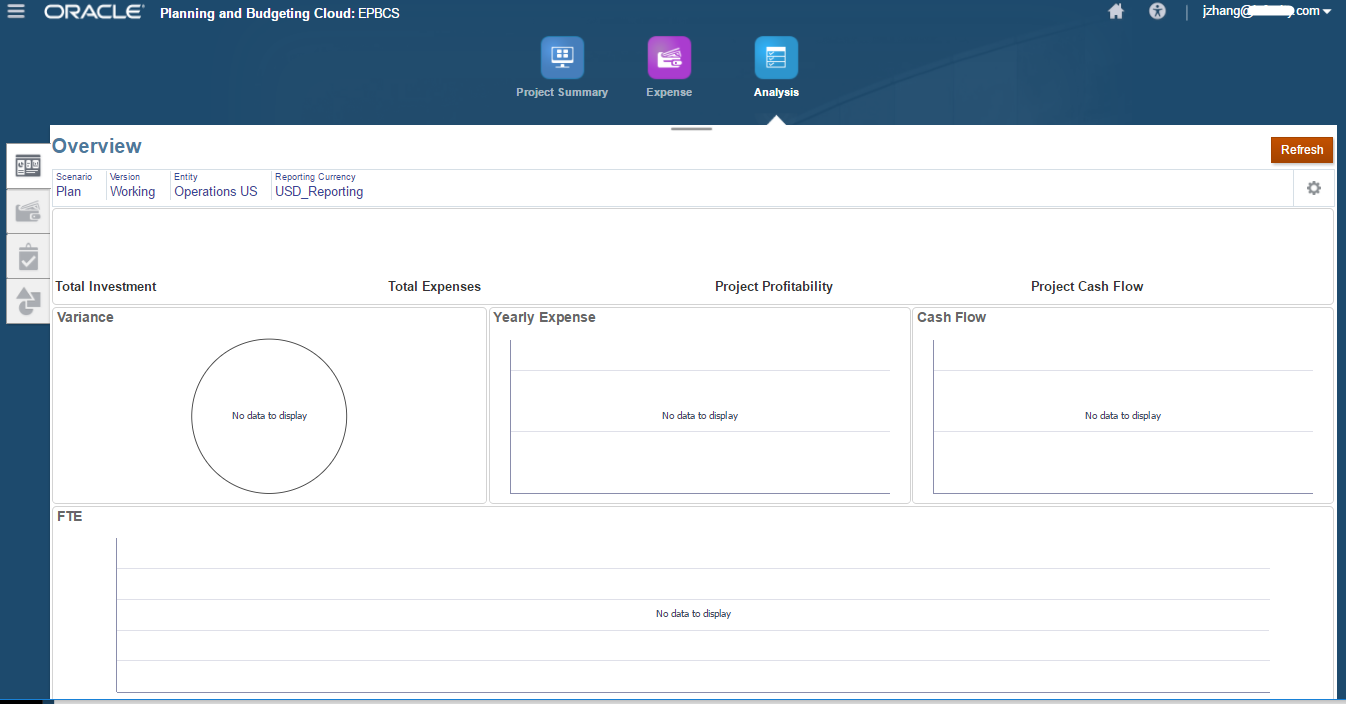
From the Analysis card, let’s view the Project Cash Flow.
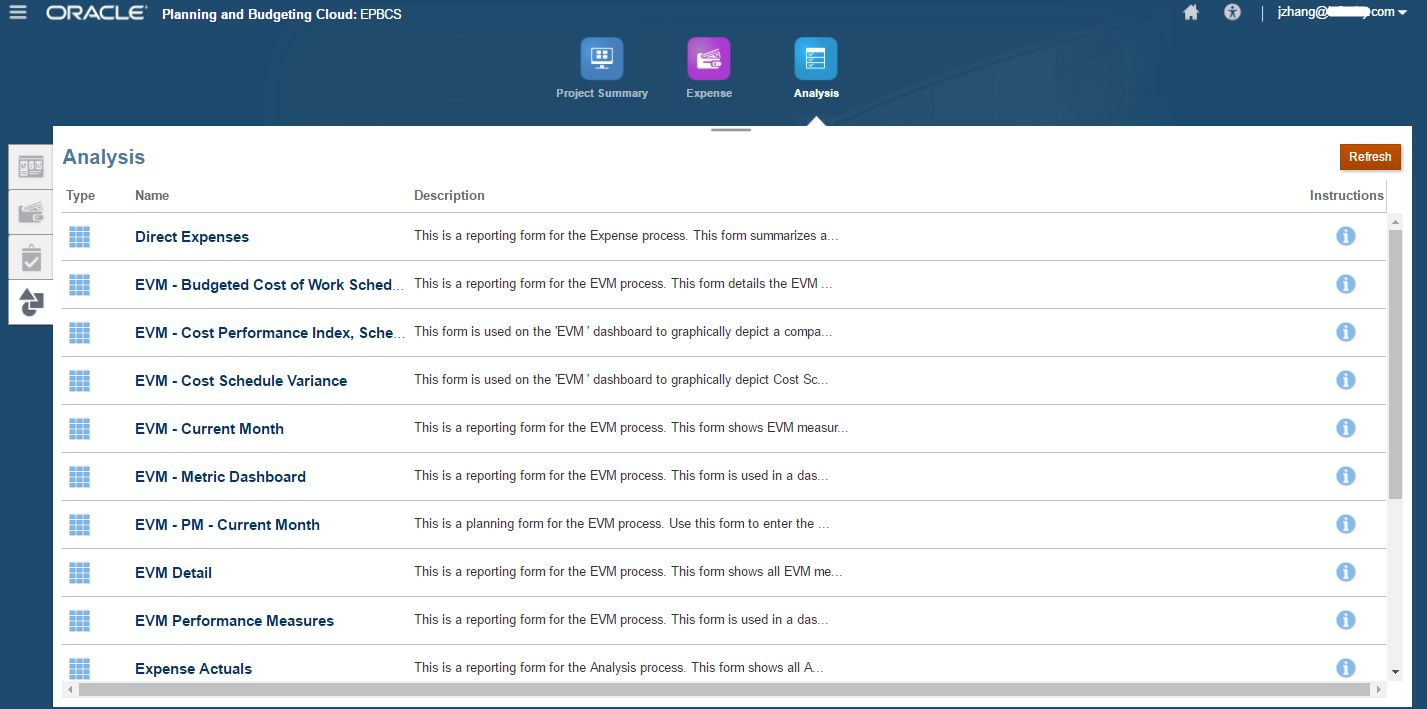
The last page of the Analysis Card contains the related webforms.
Lastly, let’s view all the cards and tabs that have been created after we configured the Projects framework.
The Project Summary Card has 2 pages, which are:
Indirect, Assumptions.

The Project Expense Card has 5 pages, which are:
Overview, Driver Based, Direct Input, Project Expense, Assumptions.
The Analysis Card has 4 pages, which are:
Overview, Profitability, Program, Forms.
As of now, we already went through how to configure the Projects prebuilt framework, and how to use this Projects framework to finish the planning and budgeting process. There are many other details and tricks that I don’t have a chance to point out. But I will definitely share more tricks with you in the future blogs. Hopefully, this one could give you some high-level ideas on what the Projects framework is.
In the next blogs, I will discuss the last framework, Strategic Modeling. Until next time.
Thank you for this. its very helpful for first timer.